Gating access with Passport scores
In this guide, you'll learn how to gate an application using Gitcoin passport. Specifically, you will:
- Fetch a score using the Gitcoin Passport API
- Examine best practices for retrieving Passport scores
- Implement gating so that some content is only available to users with scores above a threshold
- Redirect users to instructions for improving their Passport scores
This tutorial is a more detailed version of a video tutorial put together by Nader Dabit. Check out his video and related sample code at the following links:
Prerequisites
To follow this tutorial, you'll need Next.js (opens in a new tab), Node (opens in a new tab), and Chakra-UI (opens in a new tab) installed on your machine. We will also be using the Gitcoin Passport API.
Before we delve into this, it's important to note that there are a few preliminary steps you need to complete. Please ensure that these prerequisites are met before proceeding with the guide.
- You have created a Passport Scorer and received a Scorer ID
- You have an API key
If you haven't completed the preliminary steps above please refer to our getting access guide first. Once you're done with that, return here and continue with this walkthrough.
App outline
The app we will build will be an educational site where users can learn about web3 and DAOs, and then if - and only if - their Passport score is above a threshold, they can uncover the secret information required to join our example Passport DAO.
You can find the code from this tutorial in this GitHub repo (opens in a new tab).
The app will work as follows:
- When the user visits the sample app, they have access to three tabs - one to welcome them and two containing learning material about Web3 and DAOs.
- A fourth tab will contain information about how the user can join your DAO.
- The user will connect their wallet and Gitcoin Passport to the app. Their score will be calculated automatically.
- If their score meets a threshold, the fourth tab will contain instructions and links that will enable them to join the DAO.
- If the score does not meet the threshold, we'll withold the instructions and instead the tab will contain instructions for increasing their Passport score.
This simple example demonstrates the principles you would use to gate a real app using Gitcoin Passport.
The app will be built using Next.js (opens in a new tab) and will make use of several of the Scorer API endpoints.
Setting up the app
We'll create an app using Next.js (opens in a new tab). We can bootstrap using create-next-app. This automatically creates all the necessary subdirectories, configuration and boilerplate code required to get us building as quickly as possible.
Start by entering the following command into your terminal:
npx create-next-app passport-appThis will create a new directory called passport-app and populate it with several sub-directories and files that form the skeleton of our app. create-next-app will ask for yes/no responses to a series of configuration questions - answer as follows:
npx create-next-app my-passport-app

✔ Would you like to use TypeScript with this project? … Yes
✔ Would you like to use ESLint with this project? … Yes
✔ Would you like to use Tailwind CSS with this project? … No
✔ Would you like to use `src/` directory with this project? … No
✔ Would you like to use experimental `app/` directory with this project? …Yes
✔ What import alias would you like configured? … @/*
Next, change to the new my-passport-app directory and install ethers:
npm install ethersThis tutorial will also use Chakra-UI (opens in a new tab) for styling, so install it using npm:
npm i @chakra-ui/react @emotion/react @emotion/styled framer-motionNow, create a new file in my-passport-app and add the following to set the Passport API Key and Scorer ID values (if you need a reminder of how to get the API key and Scorer ID, revisit the Quick Start guide):
NEXT_PUBLIC_GC_API_KEY=<your-api-key>
NEXT_PUBLIC_GC_SCORER_ID=<your-scorer-id>
Save this file as .env.local.
Building the App
Now that the app is set up, you can begin building. The code that controls what is rendered in the browser is contained in src/app/page.tsx. When you created your project, create-next-app saved a version of page.tsx with some default code. You can delete all the code in page.tsx and replace it with this boilerplate:
//page.tsx
'use client'
import { useState, useEffect } from 'react'
import { ethers } from 'ethers'
import { ChakraProvider, Button, Flex, Heading} from '@chakra-ui/react'
import { TabLayout } from '../../tab-contents'

const APIKEY = process.env.NEXT_PUBLIC_GC_API_KEY
const SCORERID = process.env.NEXT_PUBLIC_GC_SCORER_ID

// endpoint for submitting passport
const SUBMIT_PASSPORT_URI = 'https://api.scorer.gitcoin.co/registry/submit-passport'
// endpoint for getting the signing message
const SIGNING_MESSAGE_URI = 'https://api.scorer.gitcoin.co/registry/signing-message'
// score needed to see hidden message
const thresholdNumber = 20
const headers = APIKEY ? ({
  'Content-Type': 'application/json',
  'X-API-Key': APIKEY
}) : undefined

declare global {
  interface Window {
    ethereum?: any
  }
}

export default function Passport() {

  const styles = {
    main: {
      width: '900px',
      margin: '0 auto',
      paddingTop: 90
    }
  }

  return (
    /* this is the UI for the app */
    <div style={styles.main}>
      <ChakraProvider>
        <Flex minWidth='max-content' alignItems='right' gap='2' justifyContent='right'>
        </Flex>
        <br />
        <br />
        <Heading as='h1' size='4xl' noOfLines={2}>Welcome to the decentralized web</Heading>
        <br />
        <TabLayout />

      </ChakraProvider >
    </div >
  )
}
Notice that you are importing components from three sources: ethers, @chakra-ui/react and a local file 'tab-contents'. The local file does not exist yet so you'll need to create it. Create a file called tab-contents.tsx in src/app. This is where you define the layout of four tabs on your web page and write the content that each tab should contain. You can paste the following code into your tab-contents.tsx and save the file.
//tab-contents.tsx
import React from "react"
import { Tabs, TabList, TabPanels, Tab, TabPanel } from '@chakra-ui/react'

const TabLayout = () => {
    return (
        <Tabs>
            <TabList>
                <Tab>Home</Tab>
                <Tab>Learn about Web3</Tab>
                <Tab>Learn about DAOs</Tab>
                <Tab>Join the DAO</Tab>
            </TabList>

            <TabPanels>
                <TabPanel>
                    <Welcome />
                </TabPanel>
                <TabPanel>
                    <WhatIsWeb3 />
                </TabPanel>
                <TabPanel>
                    <WhatAreDaos />
                </TabPanel>
                <TabPanel>
                    <JoinTheDao />
                </TabPanel>
            </TabPanels>
        </Tabs>
    )
}

const Welcome = () => {
    return (
        <>
            <br />
            <br />
            <p>Welcome!!</p>
            <br />
            <p>You have arrived at our DAO portal.</p>
            <p>On this site you can learn some of the fundamentals about Web3 and DAOs.</p>
            <p>If you are inspired, you can join our DAO!</p>
            <br />
            <p>However, DAO membership is only open to people whose Passport score is greater than 20.</p>
            <p>A Passport score is calculated from the stamps held in your Passport. The more stamps, the higher the score.</p>
            <br />
            <p><b>Get started by connecting your wallet and then connecting your Passport</b></p>
            <p>To add stamps to your Passport, visit the <Link href="passport.gitcoin.co" color='teal.500' isExternal>Passport App</Link>.</p>
        </>
    )
}

const WhatIsWeb3 = () => {
    return (
        <>
            <br />
            <br />
            <p>There are many definitions of Web3, but they all share some core principles:</p>
            <br />
            <li>Decentralization: ownership gets distributed across builders and users, instead of being owned by a few corporations.</li>
            <li>Permissionlessness: everyone has equal access to participate in Web3, and no one gets excluded.</li>
            <li>Ownership and Payments: crypto assets are used for transferring value, instead of outdated payment processors.</li>
            <li>Trustlessness: it operates using incentives and economic mechanisms instead of relying on trusted third-parties.</li>
            <br />
            <p>Read more about <Link href="https://ethereum.org/web3/" color='teal.500' isExternal>Web3</Link></p>
        </>
    )
}

const WhatAreDaos = () => {
    return (
        <>
            <br />
            <br />
            <p>A DAO is a collectively-owned, blockchain-governed organization with a shared mission.</p>
            <br />
            <p>DAOs allow us to work with like-minded folks around the globe, sharing responsibility for funds and operations.</p>
            <p>Instead, blockchain-based rules define how the organization works and how funds are spent.</p>
            <br />
            <p>They have built-in treasuries that no one has the authority to access without the approval of the group.</p>
            <p>Decisions are governed by proposals and voting to ensure everyone in the organization has a voice, and everything happens transparently on-chain.</p>
            <br />
            <p> If this sounds good to you, and your Gitcoin Passport score is above 20, you can join our DAO!</p>
        </>

    )
}

const JoinTheDao = () => {
    return (
        <>
            <br />
            <p>Hello world!</p>
            <br />
        </>
    )
}

export { TabLayout, WhatIsWeb3, WhatAreDaos, JoinTheDao };
You can now run the app to see what the bare bones of your project look like in the browser. Run the following command in your terminal:
npm run devNavigate your browser to localhost:3000 to see the app up and running. You should see a welcome message on the Home tab and be able to click through the other tabs to read about Web3 and DAOs. However, notice that this is currently a straightforward static site with no opportunities for connecting an Ethereum wallet or interacting with Gitcoin Passport. These are the areas we will focus on for the remainder of the tutorial.
Connecting a Wallet
Ethereum wallet connections are handled using ethers. In this section you will call some functions from ethers that allow your users to connect to the app using their Ethereum wallet. This is essential because this allows users to sign messages to approve the use of their address in Gitcoin Passport API requests.
First, you already know that the user address is going to be an important piece of data that will be passed in several requests using the Gitcoin API. This means you probably want to keep track of it in the app's state. To do this, you can add the following state variable definition immediately below export default function Passport () {
const [address, setAddress] = useState<string>('')This creates a variable address and a function setAddress you can use to update the value of address.
Next, you can create a function, connect, that will ask a user to open their wallet and allow the app to connect. In this context, "connecting" means that the app can see the user's address, account balance, and suggest transactions to approve.
The way MetaMask enables connections to Ethereum is by injecting a provider into the website. The provider exposes an API (opens in a new tab) with methods for relaying information to and from Ethereum. The default behavior is for MetaMask to route requests made using the provider API to Ethereum through its RPC service, Infura (opens in a new tab), although you can configure it to use any Ethereum node exposing an RPC port (consider using your own node!). To connect a wallet to an app, you need to detect the provider and get the user's accounts.
The provider is injected at window.ethereum. API requests can be sent to this provider by calling the request method on the provider and passing the API method you want to use. This is an asynchronous action, so you need to await the result. The following single-line of code detects the provider and requests the user accounts using the eth_requestAccounts (opens in a new tab) method, saving them to the variable accounts:
const accounts = await window.ethereum.request({ method: 'eth_requestAccounts' })This is all that is required to connect a wallet to the app, because a lot of complexity is abstracted away behind the provider API call. To turn this into a connect() function suitable for your app, you can wrap the provider API call in try/catch so you can handle any errors. You also want to pull the returned data into your app's state. The API method returns the address in an array. You can pull the address out of the array as a string by specifying accounts[0] and then pass it to the setAddress function you defined earlier. Add the following function to page.tsx immediately below your state variable (const [address, setAddress]...) definition.
  async function connect() {
    try {
      const accounts = await window.ethereum.request({ method: 'eth_requestAccounts' })
      setAddress(accounts[0])
    } catch (err) {
      console.log('error connecting...')
    }
  }
Next, we need to add a button to the UI that a user can use to trigger the connection between the app and their wallet. Near the bottom of the page, in the return statement, you will find a set of <Flex> tags that have nothing between them, immediately following the opening ChakraProvider tag. Insert the following code between the opening and closing <Flex> tags to add a button to the UI:
<Button colorScheme='teal' variant='outline' onClick={connect}>Connect</Button>You can check this is working by running the app (npm run dev) and clicking connect. This calls your new connect() function. You should see your MetaMask pop open and ask you to connect to the site.
Well done! You now have a function that can connect an Ethereum wallet to your app and store the user's address in a state variable!
Checking for existing connections
Your user might have opened your app with their wallet already connected. In this case, the process is slightly different. You do not need the pop-up window in MetaMask for the user to approve the connection, but you do need to grab the address and add it to the app's state. Since the user has already connected, this process does not require any user action - it can be automatic. To make it automatic, you need to use a useEffect hook. useEffect allows you to execute the connection logic when the Passport() component is added to the page. The logic you want to execute is:
- connect to the
provider - grab the user address
- add the user address to the app state
- handle any errors
You can achieve this by adding the following function to your app, next to your connect() function.
  useEffect(() => {
    checkConnection()
    async function checkConnection() {
      try {
        const provider = new ethers.BrowserProvider(window.ethereum)
        const accounts = await provider.listAccounts()
        // if the user is connected, set their account
        if (accounts && accounts[0]) {
          setAddress(accounts[0].address)
        }
      } catch (err) {
        console.log('not connected...')
      }
    }
  }, [])
Well done - your users can now connect their Ethereum wallet to your app. If they are already connected, their address will be added to your app's state automatically when the app is started. You can check that this is all working properly by running the app (npm run dev) and connecting your wallet.
Connecting to Gitcoin Passport
To use Gitcoin Passport, a user has to submit their Passport to the registry. This is a database of Passports linked to an Ethereum address that have been submitted for scoring. Part of the data that is passed along with a request to add a Passport to the registry is the Scorer-Id which is used to link your app to a specific instance of the Scorer you created earlier. This data together links your user's address to a specific collection of Stamps and an instance of a Scorer to use to calculate a Passport score. Therefore, this is a necessary step for integrating Passport into your app if you want to use Gitcoin Passport's default Scorer and calculate the score server-side. The weights applied to each Stamp can be found in the Passport Github (opens in a new tab).
You can skip the Passport submission and retrieve the raw Stamp data to apply your own scoring algorithm.
The way Passport submission works is to first retrieve a message using the Passport API's signing-message method. The user then signs this message using their Ethereum wallet, and sends the signed message back to the server using the Passport API's submit-passport method.
The boilerplate code already assigns the necessary API endpoints to the variables SIGNING_MESSAGE_URI and SUBMIT_PASSPORT_URI. The following code snippet shows how to write two functions: one to grab the message to sign (getSigningMessage), and one to take that message, sign it, and return it (submitPassport). Successfully executing this logic adds the user's address to the Passport registry and triggers the server to calculate a score based on the Stamps present in the owner's Passport. A step-by-step explanation of each function is provided in comments in the code snippet.
Paste the following code into your application below your checkConnection() function.
async function getSigningMessage() {
try {
    // fetch the message to sign from the server
    const response = await fetch(SIGNING_MESSAGE_URI, {
    headers
    })
    // convert the response data to a json object
    const json = await response.json()
    return json
} catch (err) {
    console.log('error: ', err)
}
}

async function submitPassport() {
try {
    // GET request to the Passport API to get the signing message and the nonce
    const { message, nonce } = await getSigningMessage()
    // instantiate a new provider instance
    const provider = new ethers.BrowserProvider(window.ethereum)
    // call the provider's `getSigner` API method to start the signing process
    const signer = await provider.getSigner()
    // ask the user to sign the message
    const signature = await signer.signMessage(message)
    // POST request to the Passport API, sending the signing message, the signature, and the nonce
    const response = await fetch(SUBMIT_PASSPORT_URI, {
    method: 'POST',
    headers,
    body: JSON.stringify({
        address,
        scorer_id: SCORERID,
        signature,
        nonce
    })
    })
    // assign the response data to `data` as a json object
    const data = await response.json()
    console.log('data:', data)
} catch (err) {
    console.log('error: ', err)
}
}
These functions contain all the logic required for a user to submit their Passport to the registry. However, this is an action that needs to be triggered by the user. We can add another button to the UI that executes the Passport submission when it is clicked. Add the following code to the UI, immediately below the connect button, inside the <Flex> tags:
<Button colorScheme='teal' variant='outline' onClick={submitPassport}>Submit Passport</Button>You can run the app and check that this works by connecting and submitting your Passport.
Getting a Passport score
Your app will show different content depending on the user's Passport score. This means you need to retrieve the user's score and keep track of it in your app's state. First, create a new state variable for tracking your user's score. You can place this immediately below your existing state variable, address:
const [score, setScore] = useState<string>('')The Passport score is retrieved from the /registry/score/ API endpoint, passing the SCORER_ID you set earlier and the user's address. The SCORER_ID is already loaded from the environment variables, and the user's address is in the app's state as address. You also need to pass your API key in the request header. The boilerplate code already handled formatting the headers and assigning them to the constant headers. This means all the ingredients are available for retrieving the Passport score. The function below puts the ingredients together and wraps in some error handling code. You can paste this new checkPassport() function into page.tsx immediately below your submitPassport() function.
async function getScore() {
  setScore('')
  const GET_PASSPORT_SCORE_URI = `https://api.scorer.gitcoin.co/registry/score/${SCORERID}/${address}`
  try {
    const response = await fetch(GET_PASSPORT_SCORE_URI, {
      headers
    })
    const passportData = await response.json()
      if (passportData.score) {
      // if the user has a score, round it and set it in the local state
        const roundedScore = Math.round(passportData.score * 100) / 100
        setScore(roundedScore.toString())
        console.log("PASSPORT SCORE = ", roundedScore)
      } else {
      // if the user has no score, display a message letting them know to submit thier passporta
       console.log('No score available, please add Stamps to your passport and then resubmit.')
      }
    } catch (err) {
      console.log('error: ', err)
    }
}
Notice that there is some additional code included in this snippet for rounding the score to two decimal place precision and converting it to a string type before passing it to setScore so that it is captured in the app state.
Great! Now you have coded all the logic required to connect a wallet, submit a Passport to the registry and retrieve a Passport score. The getScore() function isn't actually invoked anywhere yet, though. If you want to check this function works correctly, you can add the following button immediately below the other two buttons you added earlier:
<Button colorScheme='teal' variant='outline' onClick={getScore}>get score</Button>Clicking this button, after connecting a wallet and submitting a Passport to the registry, will print the following to the console (you can access your console by pressing CTRL + SHIFT + I):
PASSPORT SCORE = 26.57Notes on best practices for scoring
It is recommended to use the Gitcoin Passport default Scorer. For now, this is the only option for server-side score calculations, but you can choose whether you wish the server to return an integer value (0-100) or return a Boolean (0 or 1). This is selected when you create the instance of the Scorer at scorer.gitcoin.co (opens in a new tab).
If you choose to return an integer value, you can make your own choice about what threshold score to use to gate your content. In this tutorial, you are receiving an integer value from the Scorer API and thresholding it in the app. The threshold is hardcoded into the app with a value of 20. This is thought to be a pretty good general purpose threshold, but you can choose to raise the threshold if you want to be more stringent, or lower it to be more lenient. Picking the right threshold is application-specific and might require some experimentation to get it just right.
If you choose to return a binary value, the Gitcoin server will still calculate the Passport score using the exact same algorithm, but it will threshold it server-side and return a 0 if the user's score is below the built-in threshold of 15, or a 1 if the user's score exceeds this threshold.
You can also choose to calculate your own Passport score by retrieving raw Stamp data and applying some custom algorithm on them. This provides a lot of flexibility to app builders. However, the major reason server-side calculation is recommended is because Stamp deduplication is included in the score calculation. This means the Gitcoin server ensures that each specific user tamp can only be counted once by your Scorer instance. If you implement your own scoring algorithm, you need to account for Stamp deduplication yourself.
Gating access using the score
Now that you have a way to retrieve the user's Passport score you can use it to adjust the content they can access on your site. Specifically, you want to show different content in the "Join the DAO" tab depending on whether the user's Passport score is above some threshold.
To start, let's take a look at the content we want to differentiate. Earlier you created a file called tab-contents.tsx that contains all the content that renders inside each tab, and a TabLayout component that controls where that content is displayed. We can update this code so that TabLayout renders a different component depending on the user's Passport score. As a first step, update the JoinTheDao component so that it takes an argument isAboveThreshold. This will be a Boolean (true/false) that will be set to true if the user's score is above some threshold, and false otherwise. You can use this as a signal to render one set of content or another. To start, use the following code to render a new component Content AboveThreshold if isAboveThreshold evaluates to true and ContentBelowThreshold if isAboveThreshold evaluates to false (you will define these new components in the next step).
Update the JoinTheDao component in tab-contents.tsx as follows:
const JoinTheDao = ({ isAboveThreshold }) => {
    if (isAboveThreshold) {
        return (
            <ContentAboveThreshold />
        )
    }
    else {
        return (
            <ContentBelowThreshold />

        )
    }
}
Now you have a component, JoinTheDao that conditionally renders one of two content types depending on the value of isAboveThreshold which you will tie to the value of the user's Passport later. You now need to define two components that define the content to render in each isAboveThreshold case.
Add the following to tab-contents.tsx:
const ContentAboveThreshold = () => {
    return (
        <>
            <br />
            <br />
            <p>🎉🎉🎉</p>
            <p><b>Welcome to Passport DAO!</b></p>
            <br />
            <p>Passport DAO is a fictional DAO for Passport builders.</p>
            <p>Passport DAO does not really exist, it is just an example made up for the purposes of this tutorial!</p>
            <p>However, since you have a Passport with a score > 20 and you have built this demo app, </p>
            <p>you might enjoy the Gitcoin discord, where other Passport builders hang out.</p>
            <br />
            <p>Join fellow builders on the <Link href="https://discord.gg/gitcoin" color='teal.500' isExternal>Gitcoin Discord</Link></p >
            <p></p>
            <br />
        </>
    )
}

const ContentBelowThreshold = () => {
    return (
        <>
            <br />
            <p>😭😭😭</p>
            <br />
            <p>We would love you to join our DAO.</p>
            <br />
            <p>Unfortunately, you do not quite meet the eligibility criteria.</p>
            <p>You can go to the <Link href="passport.gitcoin.co" color='teal.500' isExternal>Passport App </Link> and add more Stamps to your Passport.</p>
            <p>When you have enough Stamps to generate a score above 20, you can come back and join our DAO!</p>
            <br />
            <p>In the meantime you can read our <Link href="docs.gitcoin.co" color='teal.500' isExternal> awesome documentation </Link> to learn more about Gitcoin passport</p>
        </>
    )
}
At this point you have implemented conditional rendering of two components depending on the value of a Boolean whose value switches based on the user's Passport score. There are a few remaining steps to implement in page.tsx to connect up these content components with the user's Passport. First, you are passing isAboveThreshold as an argument to the JoinTheDao component, but it does not exist yet in your app.
In page.tsx, add another state variable below setScore as follows:
const [isAboveThreshold, setIsAboveThreshold] = useState<Boolean>(false)Now this state variable exists, you need to pass it to the JoinTheDao component. You can do this by updating the <TabLayout> tag in the UI code. The tag can be updated so that it looks as follows:
<TabLayout isAboveThreshold={isAboveThreshold} />Now, back in tab-contents.tsx, update the TabLayout component definition so that it takes isAboveThreshold and propagates it into the JoinTheDao sub-component. The TabLayout definition should look as follows:
const TabLayout = ({ isAboveThreshold }) => {
    return (
        <Tabs>
            <TabList>
                <Tab>Home</Tab>
                <Tab>Learn about Web3</Tab>
                <Tab>Learn about DAOs</Tab>
                <Tab>Join the DAO</Tab>
            </TabList>

            <TabPanels>
                <TabPanel>
                    <Welcome />
                </TabPanel>
                <TabPanel>
                    <WhatIsWeb3 />
                </TabPanel>
                <TabPanel>
                    <WhatAreDaos />
                </TabPanel>
                <TabPanel>
                    <JoinTheDao isAboveThreshold={isAboveThreshold} />
                </TabPanel>
            </TabPanels>
        </Tabs>
    )

}
Next, you need to call the setIsAboveThreshold function to update the value of isAboveThreshold when a Passport score is retrieved. You can do this by invoking setIsAboveThreshold inside getScore, wrapped in an if statement that sets the value to true if the score is greater than the thresholdNumber defined at the top of the script, and false if the score is less than or equal to thresholdNumber. The following conditional statement can be added inside getScore() immediately after setScore(roundedScore.toString()):
if (roundedScore > thresholdNumber) {
    setIsAboveThreshold(true)
} else {
    setIsAboveThreshold(false)
}
Currently, user scores are only retrieved when the user clicks the "get score" button, but really we would like it to be automatic. Delete the get score button from the UI. Now, you can invoke the getScore() function inside the submitPassport() function so that when a user submits their Passport, the score is calculated and the values of score and isAboveThreshold are all updated in the app's state in a single click.
Simply add getScore() to submitPassport() immediately after console.log('data:', data) and before the catch statement. Since your Submit Passport button is now doing more than just submitting the Passport, it might be better to give it a more general name. For consistency with the "Connect Wallet" button, you can update the button text to "Connect Passport".
Displaying the score
Almost there! One final thing - it would be helpful for the user to know their current score so they know how much more progress they need to make to get access to the gated content. To do this, you need to render the score from your app's state in the browser. In this example, you will only show the user their score if it is below the threshold. This helps the user to determine how much they need to improve their score to access your gated content.
First, lets add the score as an argument to pass to TabLayout and propagate it from there into the JoinTheDao component and then from there into the ContentBelowThreshold component. Your TabLayout in tab-contents.tsx should look as follows:
const TabLayout = ({ isAboveThreshold, score }) => {
    return (
        <Tabs>
            <TabList>
                <Tab>Home</Tab>
                <Tab>Learn about Web3</Tab>
                <Tab>Learn about DAOs</Tab>
                <Tab>Join the DAO</Tab>
            </TabList>

            <TabPanels>
                <TabPanel>
                    <Welcome />
                </TabPanel>
                <TabPanel>
                    <WhatIsWeb3 />
                </TabPanel>
                <TabPanel>
                    <WhatAreDaos />
                </TabPanel>
                <TabPanel>
                    <JoinTheDao isAboveThreshold={isAboveThreshold} score={score} />
                </TabPanel>
            </TabPanels>
        </Tabs>
    )
}
Then you need to pass score to JoinTheDao so that the first line of the JoinTheDao definition looks as follows:
const JoinTheDao = ({ isAboveThreshold, score }) => {
    ...
Then update the ContentBelowThreshold component so that it takes score as an argument. Then you can add some simple Typescript before the return statement that creates a default string that will be used to warn the user that they don't have a Passport yet if the value of score is equal to its unset value. However, if score has had a value set, it warns the user that their score is not high enough, reporting the actual score in the text. Your final ContentBelowThreshold component should look as follows:
const ContentBelowThreshold = ({ score }) => {
    let text: string = 'Your current Passport score is ${score}'
    if (score == '') {
        text = "You do not yet have a Passport score. Maybe you haven't created or connected your Passport?"
    }
    return (
        <>
            <br />
            <p>😭😭😭</p>
            <br />
            <p>We would love you to join our DAO.</p>
            <br />
            <p>Unfortunately, you do not quite meet the eligibility criteria.</p>
            <p> {text} </p>
            <p>You can go to the <Link href="https://passport.gitcoin.co" color='teal.500' isExternal>Passport App </Link> and add more Stamps to your Passport.</p>
            <p>When you have enough Stamps to generate a score above 20, you can come back and join our DAO!</p>
            <br />
            <p>In the meantime you can read our <Link href="https://docs.gitcoin.co" color='teal.500' isExternal> awesome documentation </Link> to learn more about Gitcoin Passport</p>
        </>
    )
}
Finally, you need to pass the value of score to the TabLayout component in the UI. Back in page,tsx, update <TabLayout ...> as follows:
<TabLayout isAboveThreshold={isAboveThreshold} score={score} />🎉🎉🎉 Congratulations! 🎉🎉🎉
You now have a fully functional app! Your user can enter the app, connect their wallet and Passport. If their Passport score is above a threshold, they can see some secret content that shows them how to join a special DAO. If their Passport score is below the threshold they are shown their score and instructed to go get more Stamps.
Time to test out your app - start the app using npm run dev and click to connect your wallet and Passport!
Here's what your user sees if their Passport score is greater than 20:
"The app giving access to secret content to users that pass your eligibility gate"
Here is what your user sees if their Passport Score is lower than 20:
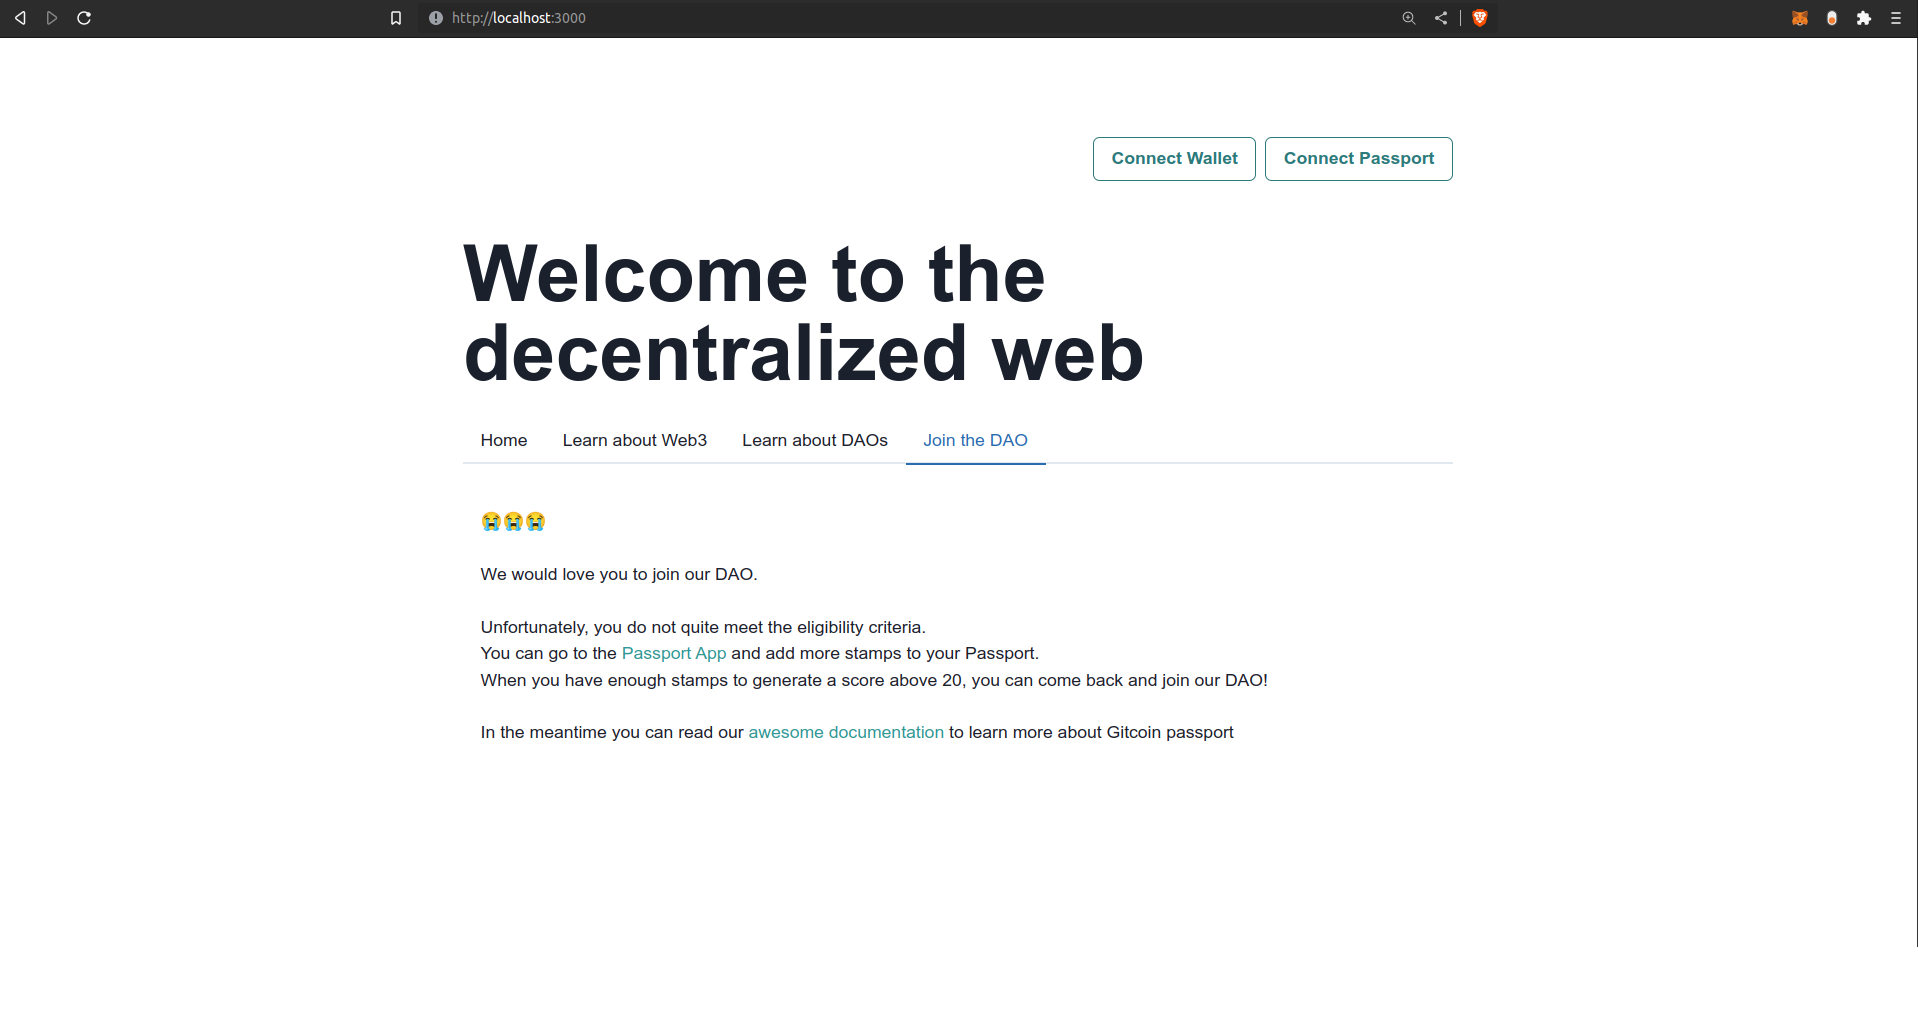
Summary
This tutorial walked you through building a basic Passport-gated application. You used Next.js to create a simple educational page about Web3 and DAOs, with a special section that invited users to join a secret Passport DAO - but only if their Passport score is above your threshold! By following this tutorial you learned:
- How to create a Scorer instance and a Passport API key
- How to use instantiate a
providerand call its API - How to connect a user's Ethereum wallet to your application and store their address in your app's state
- How to submit a Passport to the Gitcoin Passport registry using the Passport API
- How to retrieve a user's Passport score using the Passport API
- How to use the score to conditionally render some content ("Passport gating")
Further Reading
For more on Gitcoin Passport, you can keep browsing this website, or you can join the Gitcoin Discord (opens in a new tab). Having completed this tutorial, a great next step would be to try our "Integrating Stamps and Scorers" tutorial where you can learn how to handle individual Stamp data as well as Passport scores.