Integrating Stamps and Scorers
Gitcoin Passport can be used to automatically gate applications, but it can also be used as a powerful tool for supporting human decision makers by providing trust information in the app's UI. Instead of blocking access using a score threshold, Gitcoin Passport can display trust information about users connected to an app to other users, enabling better informed interactions.
Why would you want a Scorer integration?
There are several apps designed for allocating funding within DAOs. A common model is to divide contributors into teams. The team is funded with a certain budget, and the funds are later distributed to the participants according to the number of reward tokens they are allocated. Individual team members come together to perform some task and later allocate tokens to each other to determine how the funds are released.
However, there have been examples of impersonators joining teams, pretending to be one of the legitimate contributors and getting allocated tokens. This is a way attackers can steal from honest participants. Without some additional information, it is hard to know that you are allocating tokens to a real contributor and not an impersonator.
A Gitcoin Passport Scorer integration is a solution to this problem. By showing the Passport score and Stamps for each user in the app, it is easier to identify the honest participant from their dishonest double. When faced with two instances of one contributor that you want to allocate tokens to, you might check to see which one has a certain community-specific Stamp in their Passport as evidence that they are the real team member.
Note, however, that it is possible for someone to be an impersonator and also have a high Passport score. This is why a Scorer integration is more about giving additional evidence, or context, to choices than it is about automated, binary decision making.
You can find the code from this tutorial in this GitHub repo (opens in a new tab):
Let's see how an integration like this is built using the Passport API.
Prerequisites
Before we delve into this, it's important to note that there are a few preliminary steps you need to complete. Please ensure that these prerequisites are met before proceeding with the guide.
- You have created a Passport Scorer and received a Scorer ID
- You have an API key
If you haven't completed the preliminary steps above please refer to our getting access guide first. Once you're done with that, return here and continue with this walkthrough.
Integrating a Scorer
Setting up a basic app
We'll create an app using Nextjs. We can bootstrap using create-next-app. This automatically creates all the necessary subdirectories, configuration and boilerplate code required to get us building as quickly as possible.
Start by entering the following command into your terminal:
npx create-next-app passport-appThis will create a new directory called passport-app and populate it with several sub-directories and files that form the skeleton of our app. create-next-app will ask for yes/no responses to a series of configuration questions - answer as follows:
npx create-next-app passport-app

✔ Would you like to use TypeScript with this project? … Yes
✔ Would you like to use ESLint with this project? … Yes
✔ Would you like to use Tailwind CSS with this project? … No
✔ Would you like to use `src/` directory with this project? … No
✔ Would you like to use experimental `app/` directory with this project? …Yes
✔ What import alias would you like configured? … @/*
Next, change to the new passport-app directory and install ethers:
npm install ethersThis tutorial will also use Chakra-UI (opens in a new tab) for styling, so install it using npm:
npm i @chakra-ui/react @emotion/react @emotion/styled framer-motionNow, create a new file in passport-app/ and add the following to set the Passport API Key and Scorer ID values (if you need a reminder of how to get the API key and Scorer values, revisit the Quick Start guide):
NEXT_PUBLIC_GC_API_KEY=<your-api-key>
NEXT_PUBLIC_GC_SCORER_ID=<your-scorer-id>
Save this file as .env.local.
Replace the contents of app/page.tsx with the following boilerplate code (this includes all the very basic logic to render a page and connect a wallet to the app, but none of the logic required to check a user Passport - we will add this step by step in this tutorial):
'use client'
import { useState, useEffect } from 'react'
import { ethers } from 'ethers'
import { ChakraProvider, Button, Checkbox, Stack, Badge, SimpleGrid, Heading, Text } from '@chakra-ui/react'
const APIKEY = process.env.NEXT_PUBLIC_GC_API_KEY
const SCORERID = process.env.NEXT_PUBLIC_GC_SCORER_ID
// endpoint for submitting passport
const SUBMIT_PASSPORT_URI = 'https://api.scorer.gitcoin.co/registry/submit-passport'
// endpoint for getting the signing message
const SIGNING_MESSAGE_URI = 'https://api.scorer.gitcoin.co/registry/signing-message'
// score needed to see hidden message
const thresholdNumber = 20
const headers = APIKEY ? ({
'Content-Type': 'application/json',
'X-API-Key': APIKEY
}) : undefined
declare global {
interface Window {
ethereum?: any
}
}
// define Stamp here
// define UserStruct here
export default function Passport() {
// here we deal with any local state we need to manage
const [address, setAddress] = useState<string>('')
useEffect(() => {
checkConnection()
async function checkConnection() {
try {
const provider = new ethers.BrowserProvider(window.ethereum)
const accounts = await provider.listAccounts()
// if the user is connected, set their account
if (accounts && accounts[0]) {
setAddress(accounts[0].address)
}
} catch (err) {
console.log('not connected...')
}
}
}, [])
async function connect() {
try {
const accounts = await window.ethereum.request({ method: 'eth_requestAccounts' })
setAddress(accounts[0])
} catch (err) {
console.log('error connecting...')
}
}
async function getSigningMessage() {
try {
const response = await fetch(SIGNING_MESSAGE_URI, {
headers
})
const json = await response.json()
return json
} catch (err) {
console.log('error: ', err)
}
}
async function submitPassport() {
try {
// call the API to get the signing message and the nonce
const { message, nonce } = await getSigningMessage()
const provider = new ethers.BrowserProvider(window.ethereum)
const signer = await provider.getSigner()
// ask the user to sign the message
const signature = await signer.signMessage(message)
// call the API, sending the signing message, the signature, and the nonce
const response = await fetch(SUBMIT_PASSPORT_URI, {
method: 'POST',
headers,
body: JSON.stringify({
address,
scorer_id: SCORERID,
signature,
nonce
})
})
const data = await response.json()
console.log('data:', data)
} catch (err) {
console.log('error: ', err)
}
}
// add checkPassport() here
// add getPassportScore() here
// add getPassportStamps() here
// add updateShowTrusted() here
// add updateShowStamps() here
// add checkTrustedUsers() here
const styles = {
main: {
width: '900px',
margin: '0 auto',
paddingTop: 90
}
}
return (
/* this is the UI for the app */
<div style={styles.main}>
<ChakraProvider>
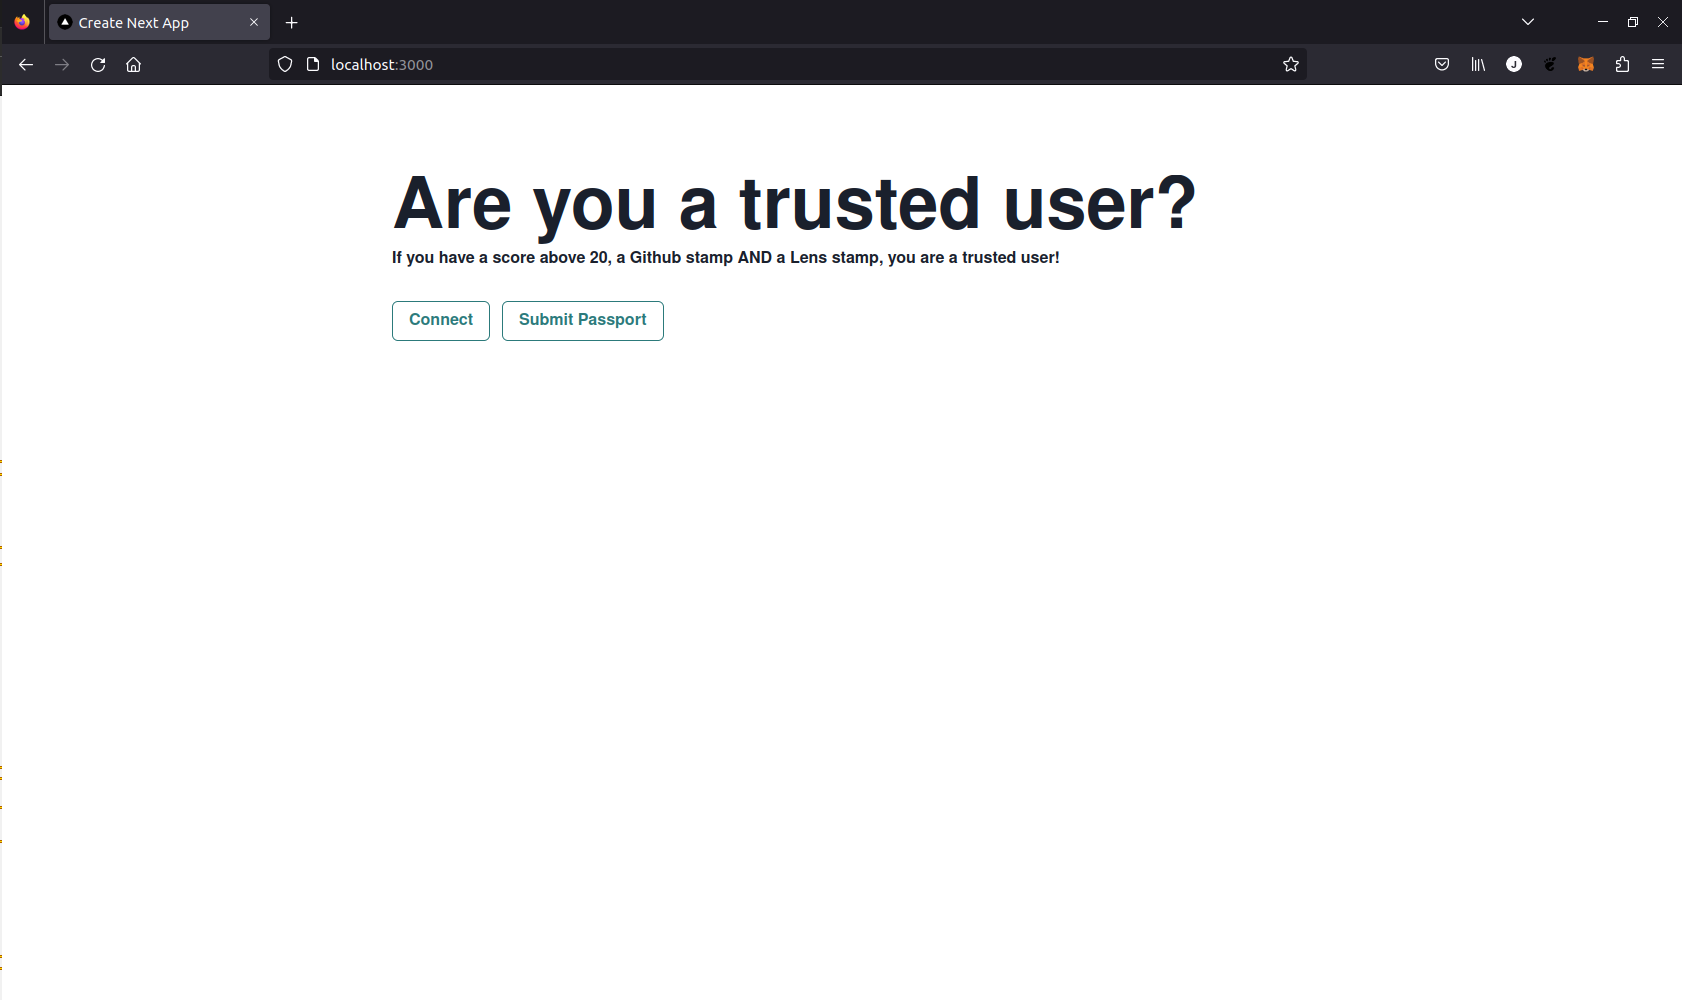
<Heading as='h1' size='4xl' noOfLines={1}>Are you a trusted user?</Heading>
<Text as='b'>If you have a score above 20, a Github Stamp AND a Lens Stamp, you are a trusted user!</Text>
<Stack spacing={3} direction='row' align='center' marginTop={30}>
<Button colorScheme='teal' variant='outline' onClick={connect}>Connect</Button>
<Button colorScheme='teal' variant='outline' onClick={submitPassport}>Submit Passport</Button>
</Stack>
</ChakraProvider >
</div >
)
}You can start this app now by navigating your terminal to the project directory (passport-app) and running npm run dev. Then, navigate your browser to localhost:3000. You will see a basic app load in the browser, with buttons that enable you to connect your wallet and submit your Passport to the registry. You can go ahead and test that the Connect and Submit Passport buttons are working as expected.
Your app should look like this:
The rest of the tutorial will build upon this basic app by adding functions and UI code to app/page.tsx.
Checking a Passport
In this tutorial you will learn how to create a more advanced Scorer integration that will determine whether connected users are trusted or untrusted according to a combination of their score and ownership of specific stamps.
The boilerplate code already provides buttons the users can click to connect their wallet and submit their Passport to the registry. We won't cover these functions again in this tutorial, so please note that a wallet connection and submitted Passport are required for calls to the Scorer API to return useful responses.
Retrieving a score
We want to display a user's trust status in the app's UI. Their trust status will be determined by their Passport score and ownership of specific Stamps. The weights applied to each Stamp can be found in the Passport Github (opens in a new tab).
The first step is to retrieve their Passport score by calling the /registry/score/${SCORER_ID}/${address} API endpoint.
The following function requests a user's Passport score from that endpoint. If no score exists it prints a warning to the console.
async function getPassportScore(currentAddress: string) {
  console.log("in getScore()")
  const GET_PASSPORT_SCORE_URI = `https://api.scorer.gitcoin.co/registry/score/${SCORERID}/${currentAddress}`
  try {
    const response = await fetch(GET_PASSPORT_SCORE_URI, {
      headers
    })
    const passportData = await response.json()
    if (passportData.score) {
      // if the user has a score, round it and set it in the local state
      const roundedScore = Math.round(passportData.score * 100) / 100
      return roundedScore
    } else {
      // if the user has no score, display a message letting them know to submit thier passport
      console.log('No score available, please add Stamps to your passport and then resubmit.')
    }
  } catch (err) {
    console.log('error: ', err)
  }
}
Retrieving Stamps
Next we want to retrieve the user's Stamps by calling the /registry/stamps endpoint. The following function requests a user's Passport Stamp data from that endpoint and prints it to the console. If no score exists it prints a warning to the console.
async function getPassportStamps(currentAddress: string) {
  console.log("in getStamps()")
  const stampProviderArray = []
  const GET_PASSPORT_STAMPS_URI = `https://api.scorer.gitcoin.co/registry/stamps/${currentAddress}`
  try {
    const response: Response = await fetch(GET_PASSPORT_STAMPS_URI, { headers })
    const data = await response.json()
    console.log(data)
  } catch (err) {
    console.log('error: ', err)
  }
}
We can invoke the function on the click of a button by adding the following to the UI:
<Button colorScheme='teal' variant='outline' onClick={() => getPassportStamps(address)}>Check Stamps</Button>
If we run the app using npm run dev, connect a wallet that has some Stamps and click the Check Stamps button, the following information will be displayed in the console. In this example there are 33 credentials in the array, with one expanded as an example - the length of the items array will depend upon how many verified credentials the Passport holds.
stamp data:
Object { next: null, prev: null, items: (33) […] }
  items: Array(33) [ {…}, {…}, {…}, … ]
    0: Object { version: "1.0.0", credential: {…}
      credential: Object { issuer: "did:key:z6MkghvGHLobLEdj1bgRLhS4LPGJAvbMA1tn2zcRyqmYU5LC", issuanceDate: "2023-04-20T13:21:38.948Z", expirationDate: "2023-07-19T13:21:38.948Z", … }
        "@context": Array [ "https://www.w3.org/2018/credentials/v1" ]
        credentialSubject: Object { id: "did:pkh:eip155:1:0x1D4098C948Dc41958Bf3A745deC77AE059C3aDF6", hash: "v0.0.0:kWgm+E06OQrSk0M9NcEI3il5FIs9UoJQP3geH4LBuoY=", provider: "Google", … }
        expirationDate: "2023-07-19T13:21:38.948Z"
        issuanceDate: "2023-04-20T13:21:38.948Z"
        issuer: "did:key:z6MkghvGHLobLEdj1bgRLhS4LPGJAvbMA1tn2zcRyqmYU5LC"
        proof: Object { jws: "eyJhbGciOiJFZERTQSIsImNyaXQiOlsiYjY0Il0sImI2NCI6ZmFsc2V9..sgcMRAONRMo7TfTgmMPgvfaP_MOzyiXcErIsIKap-nNpOuTNGSkhTdgxWFl5Mp6ueYnmcRDkgxBiDNCMmS5GDA", type: "Ed25519Signature2018", created: "2023-04-20T13:21:38.948Z", … }
        type: Array [ "VerifiableCredential" ]
        <prototype>: Object { … }
        version: "1.0.0"
<prototype>: Object { … }
1: Object { version: "1.0.0", credential: {…} }
2: Object { version: "1.0.0", credential: {…} }
3: Object { version: "1.0.0", credential: {…} }
4: Object { version: "1.0.0", credential: {…} }
5: Object { version: "1.0.0", credential: {…} }
...
next: null
prev: null
<prototype>: Object { … }
Printing this object to the console isn't particularly useful to us, but seeing the object structure in this way demonstrates that the API call is working correctly and gives us information we can use to parse the Stamp data effectively.
Handling Stamp data
There is a lot of information contained in the object returned from /registry/stamps - for most use-cases only a subset of the data is useful. We might, for example, only be interested in the Stamp provider, and not the granular details of the credential expiry, proof etc. We can parse this information out of each item in the array.
Let's just try to parse out the useful information first. We'll do this in a separate function, so let's replace our console.log() statement with a some simple code that parses out the provider for each of the user's stamps as a string and adds it to an Array. We'll print this array to the console to check we only have the provider strings.
async function getPassportStamps(currentAddress: string) {
  console.log("in getStamps()")
  const stampProviderArray = []
  const GET_PASSPORT_STAMPS_URI = `https://api.scorer.gitcoin.co/registry/stamps/${currentAddress}`
  try {
    const response: Response = await fetch(GET_PASSPORT_STAMPS_URI, { headers })
    const data = await response.json()
    // parse stamp data from json
    for (const i of data.items) {
      stampProviderArray.push(i.credential.credentialSubject.provider)
    }
    console.log(stampProviderArray)
  } catch (err) {
    console.log('error: ', err)
  }
}
Clicking the Check Stamps button will now display the following in the console:
  stampProviders: Array(33) [ "Google", "NFT", "GitPOAP", … ]
    0: "Google"
    1: "NFT"
    2: "GitPOAP"
    3: "POAP"
    4: "Lens"
    5: "Ens"
    6: "FiftyOrMoreGithubFollowers"
    7: "TenOrMoreGithubFollowers"
    8: "StarredGithubRepoProvider"
    9: "ForkedGithubRepoProvider"
    10: "FiveOrMoreGithubRepos"
    11: "Github"
    12: "Discord"
    13: "EthGasProvider"
    ...
Now, for our actual app we want to return the array to use elsewhere instead of just printing it to the console, so replace console.log(stampProviderArray) with return stampProviderArray.*
Tracking the Stamps and score in state
The two functions, getPassportScore() and getPassportStamps() return data that we want to keep track of in our app so that we can use it to make decisions about the trustworthiness of a user. This means we need a way to track this data in the app's state and functions that access that state to make some calculations.
We can start by wrapping the two functions in an outer checkPassport() function that calls both getPassportScore() and getPassportStamps:
  async function checkPassport(currentAddress = address) {
    let score: number = await getPassportScore(currentAddress) as number
    let stampProviders = await getPassportStamps(currentAddress) as Array<string>
  }
Instead of creating lots of state variables for each user, we can define an interface that can hold all the relevant information we want to track about each user. Add the following interface to the boilerplate code outside of the Passport() component:
interface UserStruct {
  id: number;
  address: string;
  score: number;
  stampProviders: Array<Stamp>;
}
The UserStruct interface has fields for the user's address, score and Stamp providers as well as a unique identifier. Notice that we also defined the type of the stampProviders field to be an array of Stamp - this is a new struct we haven't defined yet. We need instances of Stamp to contain the name of each Stamp provider with a unique identifier. Add the following interface to the code just above the UserStruct:
interface Stamp {
  id: number
  stamp: string
}
In our checkPassport() function, we can pass the responses from getPassportScore() and getPassportStamps() into a new instance of UserStruct. We can then add each instance to a state variable array. First, add a state variable userInfo as an array that will take instances of UserStruct.
const [userInfo, setUserInfo] = useState<Array<UserStruct>>([])Now, we can update checkPassport() to create a new UserStruct from the values returned from the Passport API calls, plus the user address and a unique ID calculated by adding 1 to the current length of the userInfo array. This new UserStruct is added to the userInfo array using the setUserInfo method.
Remember, before constructing the UserStruct we have to parse the Stamp providers into an array of Stamps that can be passed to the UserStruct's stampProviders field.
We also want to add a condition to prevent repeatedly adding the same user to the userInfo array, so we can wrap the call to setUserInfo in a simple if statement to check whether the user already exists.
async function checkPassport(currentAddress = address) {
  let score: number = await getPassportScore(currentAddress) as number
  let stampProviders = await getPassportStamps(currentAddress) as Array<string>
  let stamps: Array<Stamp> = []
  for (var i = 0; i < stampProviders.length; i++) {
    let s: Stamp = { id: i, stamp: stampProviders[i] }
    stamps.push(s)
  }
  const id = userInfo.length + 1
  let user: UserStruct = { id: id, address: currentAddress, score: score, stampProviders: stamps }
  console.log(user)
  if (userInfo.map(user => user.address).includes(currentAddress || currentAddress.toUpperCase())) {
    console.log("address already checked")
  } else {
    console.log("adding user to state var")
    console.log("userInfo", userInfo)
    setUserInfo(userInfo.concat(user))
  }
  console.log("userInfo", userInfo)
}
Now each user's Stamps and score are tracked in custom structs in our application's state.
Using the Stamp and score data
Now we can use the state data to make decisions about each user. Maybe we just want a quick way to tell whether a connected user meets some specific requirements. Let's create a simple example where we display a list of connected addresses that are trusted because their Passport meets some requirements. This means the users of our app can see a real-time list of addresses that meet the eligibility criteria and can use this to help pick out the honest users.
Let's set some arbitrary requirements. If the user has a Lens Stamp and an ENS Stamp and a Github Stamp, and their Passport score is greater than 20, then they are considered trusted and their address is displayed in the browser.
So far, we have set up a state variable to collect all the connected users. We want a subset of those users that meet our eligibility requirements. We can achieve this by calling filter on the userInfo array. We'll filter on our trust criteria by checking the stampProviders and score fields of each UserStruct in userInfo and return the filtered array:
function checkTrustedUsers() {
  return userInfo.filter(user => user.stampProviders.filter(
    provider => provider.stamp.includes('Lens')
      && (provider.stamp.includes("Github"))
  )
  ).filter(user => user.score > 20)
}
We can now keep track of this filtered array in our app's state too. Create a new state variable, TrustedUsers. Its type should be an array of UserStructs.
const [trustedUsers, setTrustedUsers] = useState<Array<UserStruct>>([])Now we can update the app's state by passing checkTrustedUsers() to setTrustedUsers().
setTrustedUsers(checkTrustedUsers())Don't actually add this call to setTrustedUsers() to the app just yet - we'll include it inside another function in the next section.
Displaying trusted users in the UI
For our demo app, we simply want to display the trusted users in the UI. In real world applications the user data might be used in more complex ways. For example, you might build in a small warning pop up when you call some function passing an address that does not appear in TrustedUsers.
Let's just add a button that will toggle displaying the trusted users on or off.
We'll create a small function that sets a boolean to control the display that will be part of the app's state.
Add the new state variable, initialized to false:
const [showTrusted, setShowTrusted] = useState<boolean>(false)Now add updateShowTrusted that resets TrustedUsers and sets ShowTrusted to true. This is where we want to call the setTrustedUsers() function.
const updateShowTrusted = () => {
  setTrustedUsers(checkTrustedUsers())
  if (showTrusted === false) {
    setShowTrusted(true)
  } else {
    setShowTrusted(false)
  }
}
Now, we want to make sure all this logic is executed as soon as a user connects their wallet. The API calls, data handling, and state management is all handled by a single call to our checkPassport() function. So, to make this happen automatically on connection, we can simply invoke the checkPassport() function inside our connect() and checkConnection() functions.
The connect() and checkConnection() functions should end up as follows:
useEffect(() => {
  checkConnection()
  async function checkConnection() {
    try {
      const provider = new ethers.BrowserProvider(window.ethereum)
      const accounts = await provider.listAccounts()
      // if the user is connected, set their account and fetch their score
      if (accounts && accounts[0]) {
        setAddress(accounts[0].address)
        checkPassport(accounts[0].address)
      }
    } catch (err) {
      console.log('not connected...')
    }
  }
}, [])


async function connect() {
  console.log("in connect func")
  try {
    const accounts = await window.ethereum.request({ method: 'eth_requestAccounts' })
    setAddress(accounts[0])
    checkPassport(accounts[0])
  } catch (err) {
    console.log('error connecting...')
  }
}
Now, in our UI, we can add a button that calls this function. This button can replace the Check Stamps button we created earlier.
<Button colorScheme='teal' variant='outline' onClick={updateShowTrusted}>Check Users</Button>Let's also add a way to show which specific Stamps the connected user owns. We might not always need to know this, so we'll hide it behind a checkbox - this way a user can see at a glance whether the user is trusted but also get more granular information if they need it.
We can start by defining a function, just like updateShowTrusted that acts like a boolean switch, but this time it will toggle displaying the connected user's Stamps.
const updateShowStamps = () => {
  if (showStamps === false) {
    setShowStamps(true)
    console.log("stamps = true")
  } else {
    setShowStamps(false)
    console.log("stamps = false")
  }
}
And, again, we need to add a new state variable to track the state of this switch:
const [showStamps, setShowStamps] = useState<boolean>(false)And add a checkbox to the UI that calls updateShowStamp when it is checked (you can add this after the Button elements inside the<Stack> </Stack> tags):
<Checkbox colorScheme='telegram' onChange={updateShowStamps}>Show Stamps</Checkbox>The final step is to update the UI code so that the data is actually displayed when the appropriate buttons and checkbox are activated.
Immediately below the block of UI code wrapped in Stack tags, we can add the following div element:
<div>
  <br />
  {showTrusted && <h3><b>Trusted users</b></h3>}
  <br />
  {showTrusted && trustedUsers.map(user => <ul key={user.id}> {user.address} </ul>)}
</div>
This element contains two conditional rendering statements. They check whether showTrusted is true and if so, they render a title and the contents of trustedUsers (our filtered list of users that pass the trust criteria) to the browser.
Immediately after that div element, we can add the following code which displays the user's Stamps if the Show Stamps checkbox is activated:
{showStamps &&
  <SimpleGrid columns={4} spacing='10px' marginTop={30}>
    {showTrusted && showStamps && trustedUsers.map(user => user.stampProviders.map(s => <Badge key={s.id} colorScheme='green'>{s.stamp}</Badge>))}
  </SimpleGrid>}
Now, if you run your app locally using npm run dev you will be able to connect your wallet, submit your Passport and check whether you pass the trust criteria. If you do, your address will be rendered to the screen. If you check the Show Stamps box, all your Stamps will be shown in the browser.
public/trusted-user-app.png)
Multiple users
Now we've seen our app work properly for our own wallet, we can check that it works for multiple users. To keep it simple, we will do this by populating our userInfo state variable with some dummy user data. This simulates the situation where multiple users have connected to the app.
Adding some data to the definition of userInfo as follows:
  const [userInfo, setUserInfo] = useState<Array<UserStruct>>([
    { id: 0, address: '0x3c9840c489bb3b95cbf7a449dba55ab022cf522c', score: 23, stampProviders: [{ id: 0, stamp: 'Github' }, { id: 1, stamp: 'Lens' }] },
    { id: 1, address: '0x49bbd0c489bb3b95cbf7a44955aa55b022c1fff5', score: 19, stampProviders: [{ id: 0, stamp: 'Github' }, { id: 1, stamp: 'Google' }] },
    { id: 2, address: '0x5b985cbf40c489b5cbf7ffa449dba55ab022c1fb', score: 15, stampProviders: [{ id: 0, stamp: 'Google' }, { id: 1, stamp: 'Twitter' }] },
    { id: 3, address: '0x6e9840c41ffb3b95cbf7adba9dba55ab01fff5a4', score: 28, stampProviders: [{ id: 0, stamp: 'Github' }, { id: 1, stamp: 'Lens' }] }])
Now when the app starts, it will instantiate the userInfo state variable with these dummy users already inside. When we connect, our address will be added to the array. There are two addresses in the userInfo defined in the snippet above that will pass the default trust criteria.
We can do a quick sanity check and run the app and click Check Users - we will see those two addresses listed.
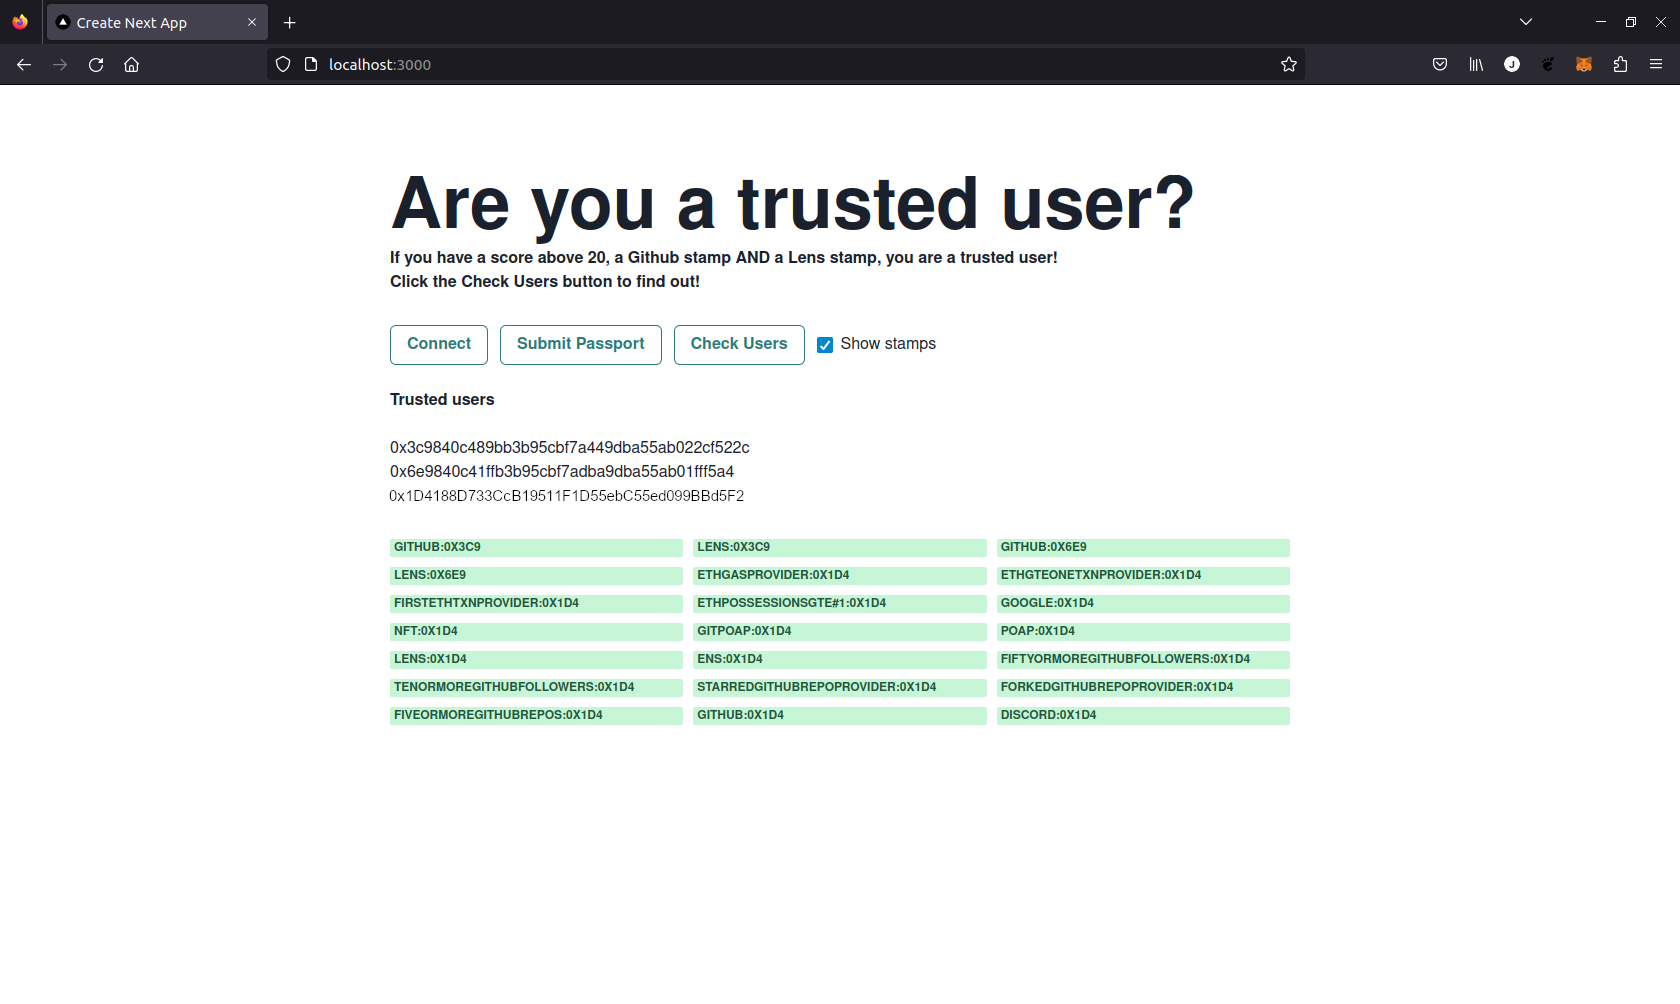
With our current rendering logic, the Show Stamps checkbox will list all the Stamps from all the users in one large list - we won't actually be able to tell who has which Stamp. To solve this, we can simply add the first few characters of each user address to each Stamp so we can map Stamps to owners. To do this, replace the final lines (where we define a SimpleGrid element) in the UI code with the following:
<SimpleGrid columns={3} spacing='10px' marginTop={30}>
  {showTrusted && showStamps && trustedUsers.map(user => user.stampProviders.map(s => <Badge key={s.id} colorScheme='green'>{s.stamp}:{user.address.substring(0, 5)}</Badge>))}
</SimpleGrid>}
Now, when we follow through our connect -> submit -> check users -> show Stamps flow, we will see something like the following:
Summary
We have built a simple app that allows users to connect their wallets and trusted addresses that meet the score and Stamp criteria are displayed in the browser!
Of course the app we created here has the bare minimum functionality required to demonstrate score and Stamp management, but the concepts explained here can be used to create more complex apps that use the Stamp and score criteria to support human decision making or more complex automated processes.