Building with Passport
Integrating onchain Stamp data

Integrating onchain Stamp data

In this tutorial, you'll learn how to show different content to users depending on their Passport data. Here, the Stamp data will be retrieved from the blockchain.

Specifically, you will:

  • Fetch user Stamp data from the blockchain using the Gitcoin Passport smart contract stack
  • Use Stamp data to generate your own Passport score, using Gitcoin's Stamp weights.
  • Conditionally display a user's Passport data depending on their onchain data.
  • Redirect users to instructions for improving their Passport scores and getting their Stamps onchain.

You can learn more about Passport's available smart contracts and the typical developer flow via our contract reference page.

Prerequisites

To follow this tutorial, you'll need Next.js (opens in a new tab), Node (opens in a new tab), and Chakra-UI (opens in a new tab) installed on your machine. You will be using the BaseGoerli (opens in a new tab) test network - you will need to import this network into your wallet. Some familiarity with smart contracts is recommended.

This app uses a blockchain, rather than Gitcoin's database server, as a backend. This means you do not need an API key or Scorer ID, but you do need to have a browser wallet that can connect to the BaseGoerli test network.

App outline

The app we will build will be a webpage where users can connect their wallet to check their onchain credentials.

You can find the code from this tutorial in this GitHub repo (opens in a new tab).

The app will work as follows:

  • When the user visits the sample app, they have access to several tabs - one to welcome them and then more where they can check their onchain data. The second tab shows whether there is any onchain data for the connected user. The third shows what Stamps the user has. The final tab shows the user's Passport score.
  • The user will connect their wallet and Gitcoin Passport to the app. Their data will be retrieved from the blockchain and their score will be calculated automatically from their Stamps.
  • If the user does not have any Stamps, the tabs contain information about how to create a Passport, add Stamps and migrate them onchain.

This simple example demonstrates the principles you would use to gate a real app using Gitcoin Passport onchain.

The app will be built using Next.js (opens in a new tab).

Smart contract logic

To understand this app, it is necessary to understand how the Gitcoin Passport smart contract stack is organized. The Gitcoin Passport smart contracts build on top of EAS (Ethereum Attestation Service) (opens in a new tab), using Attestations as the foundational building blocks.

You can read the contract reference page for a primer on how the contracts work.

Attestations are digital records that are cryptographically signed by some trusted attester. In this case, Gitcoin signs to verify that a user has a Stamp. Attestations conform to schema. Schema are predefined structures for Attestations that ensure all the necessary data are included when an Attestation is created, and that it can be decoded and verified easily.

Gitcoin has an attester contract that allows trusted Gitcoin addresses to create attestations, confirming to the schema, that demonstrate that a user owns some set of Stamps. The attestation contains all the necessary metadata about those Stamps. The Attestation has a unique identifier (uuid) that connects all this data to the user's specific address.

As an app builder, you are interested in retrieving the Attestation for a given address. To do this you use the Resolver contract. This accepts an address and returns the associated uuid that you can then pass to the EAS contract to retrieve the attestation, which you can then decode and use in your app.

So your flow is:

  • get user address
  • pass user address to resolver contract, returning a unique attestation identifier (uuid)
  • pass the uuid to the EAS contract, returning an Attestation
  • decode and unpack the Attestation, returning the user's Stamp data

Setting up the app

We'll create an app using Next.js (opens in a new tab). We can bootstrap using create-next-app. This automatically creates all the necessary subdirectories, configuration and boilerplate code required to get us building as quickly as possible.

Start by entering the following command into your terminal:

npx create-next-app passport-onchain-app

This will create a new directory called passport-app and populate it with several sub-directories and files that form the skeleton of our app. create-next-app will ask for yes/no responses to a series of configuration questions - answer as follows:

npx create-next-app passport-onchain-app
 
 Would you like to use TypeScript?   Yes
 Would you like to use ESLint?   Yes
 Would you like to use Tailwind CSS?  No 
 Would you like to use `src/` directory?   Yes
 Would you like to use App Router? (recommended)  Yes
 Would you like to customize the default import alias?  No 

Next, change your working directory to the new my-passport-app directory and install ethers:

npm install ethers

We also need the Ethereum Attestation Service software development kit:

npm install @ethereum-attestation-service/eas-sdk

Finally, this tutorial will also use Chakra-UI (opens in a new tab) for styling:

npm i @chakra-ui/react @emotion/react @emotion/styled framer-motion

Since the data you will work with is all available on a public blockchain, there is no need to handle any sensitive information such as API keys. You can just get coding!

Building the App

Now that the app is set up, you can begin building. The code that controls what is rendered in the browser is contained in src/app/page.tsx. When you created your project, create-next-app saved a version of page.tsx with some default code. You can delete all the code in page.tsx and replace it with this boilerplate:

'use client'
import { useState, useEffect } from 'react'
import { ethers } from 'ethers'
import { BigNumber } from "@ethersproject/bignumber";
import { ChakraProvider, Flex, Heading, Button } from '@chakra-ui/react'
import { TabLayout } from './tab-contents'
import { Attestation, SchemaEncoder } from "@ethereum-attestation-service/eas-sdk";
import { resolverAbi, EasAbi } from "./abis";
import { PROVIDER_ID, providerBitMapInfo, DecodedProviderInfo } from "./providerInfo";
import { GITCOIN_PASSPORT_WEIGHTS } from './stamp-weights';
 
const resolverContractAddress = "0xc0fF118369894100b652b5Bb8dF5A2C3d7b2E343";
const EasContractAddress = "0xAcfE09Fd03f7812F022FBf636700AdEA18Fd2A7A"
 
declare global {
  interface Window {
    ethereum: any
  }
}
 
declare global {
  var provider: ethers.BrowserProvider
}
 
interface Stamp {
  id: number
  stamp: string
}
 
export default function Passport() {
  // here we deal with any local state we need to manage
  const [address, setAddress] = useState<string>('default')
  const [connected, setConnected] = useState<boolean>(false)
  const [hasStamps, setHasStamps] = useState<boolean>(false)
  const [stamps, setStamps] = useState<Array<Stamp>>([])
  const [score, setScore] = useState<Number>(0)
  const [network, setNetwork] = useState<string>('')
 
  useEffect(() => {
    checkConnection()
    async function checkConnection() {
      if (connected) {
        console.log("already connected")
      } else {
        const result = await connect()
        console.log(result)
      }
    }
  }, [address, connected])
 
  async function connect() {
    try {
      globalThis.provider = new ethers.BrowserProvider(window.ethereum)
      const accounts = await window.ethereum.request({ method: 'eth_requestAccounts' })
      const network = await provider.getNetwork()
      setAddress(accounts[0])
      setConnected(true)
      setNetwork(network.chainId.toString())
    } catch (err) {
      console.log('error connecting...')
    }
    return true
  }
 
  const styles = {
    main: {
      width: '900px',
      margin: '0 auto',
      paddingTop: 90
    }
  }
 
  return (
    /* this is the UI for the app */
    <div style={styles.main}>
      <ChakraProvider>
        <Flex minWidth='max-content' alignItems='right' gap='2' justifyContent='right'>
          <Button colorScheme='teal' variant='outline' onClick={connect}>Connect</Button>
        </Flex>
        <div>
          {connected && <p>✅ Wallet connected</p>}
          {connected && network == "84531" && <p>✅ network: BaseGoerli</p>}
          {connected && network != "84531" && <p>🔴 Please switch to BaseGoerli network</p>}
        </div>
        <br />
        <br />
        <br />
        <br />
        <Heading as='h1' size='4xl' noOfLines={2}>Onchain Stamp Explorer!</Heading>
        <br />
        <br />
        <TabLayout hasStamps={hasStamps} stamps={stamps} score={score} />
      </ChakraProvider >
    </div >
  )
}

Note that you can swap out the contract addresses if you want to run an app on a different network. You can check all the deployed contrac addresses on the contract reference page

There are some parts of this boilerplate code that might look unfamiliar even if you have been through the other tutorials on this site. This is because there is some specific set up required to use smart contracts on the backend.

First, the provider field is being assigned as a global variable. The provider is a connection to the blockchain. In this app, the connection is made by inheriting network configuration from your wallet. If you are using Metamask with default settings, your connection will be via Infura to whichever network your wallet is connected to. If you have a wallet pointing to your own node's RPC provider, it will use that. The reason provider is assigned to a global variable is so that it can be captured during the wallet connection but later it can be passed as an argument when you create instances of the smart contracts.

The chainID for the network you are connected to is requested from the provider too and the value is stored in the app's state. This is used in the UI to warn the user if they are connected to a network other than Base Goerli. There are two statuses presented in the UI - one that confirms that the user is connected and one that either confirms the wallet is connected to Base Goerli or warns the user they are connected to the wrong network.

Second, there are two contract addresses defined immediately below the import statements:

The chainID for the network you are connected to is requested from the provider too and the value is stored in the app's state. This is used in the UI to warn the user if they are connected to a network other than Base Goerli. There are two statuses presented in the UI - one that confirms that the user is connected and one that either confirms the wallet is connected to Base Goerli or warns the user they are connected to the wrong network.

Seconds, there are two contract addresses defined immediately below the import statements:

const resolverContractAddress = "0xc0fF118369894100b652b5Bb8dF5A2C3d7b2E343";
const EasContractAddress = "0xAcfE09Fd03f7812F022FBf636700AdEA18Fd2A7A"

These are the addresses on the BaseGoerli blockchain where the relevant contracts are stored. The two contracts you need for your app are the resolver contract and the EAS contract.

  • The resolver contract is where you can request a uuid for an address.
  • The EAS contract is where you can pass a uuid and receive an Attestation.

Additional files

There are several elements being loaded into the app from local files. In this section, we will describe how to set these up. If you are building this app along with this tutorial as opposed to just using the example app, you will need to create these files and add the proper code to them, referenced in the links.

These are the additional files that we will be creating:

import { resolverAbi, EasAbi } from "./abis";
import { PROVIDER_ID, providerBitMapInfo, DecodedProviderInfo } from "./providerInfo";
import { GITCOIN_PASSPORT_WEIGHTS } from './stamp-weights';

The imported elements from ./abis are contract ABIs (application binary interfaces). These are json objects that define the functions available in a smart contract. To create an instance of a contract, you need both the ABI and the address the contract is deployed to. You will need to create a file in the src/app folder called abis.ts and populate it with the information located in this GitHub file (opens in a new tab).

The imported elements from ./providerInfo define details about the Stamp providers, including the schema for decoding the Attestation into a useable format - more on that later. Again, create a file in the src/app folder called providerInfo.ts and populate it with the code located in this GitHub file (opens in a new tab).

The elements imported from ./stamp-weights is a list of weights for each Stamp used to create a Passport score. In the 'web2' model for Gitcoin Passport this is done server-side, but here we will implement our own scoring algorithm using onchain Stamps. Again, create a file in the src/app folder called stamp-weights.ts and populate it with the code located in this GitHub file (opens in a new tab).

Note that the information in providerInfo.ts and stamp-weights.ts need to stay consistent with Gitcoin - you can check the up-to-date list of stamp weights in this Github file (opens in a new tab). The Bitmap mapping can be found in this Github file (opens in a new tab). You could also create your own weightings if you want to implement your own scoring algorithm. The source of truth for the PROVIDER_ID is in this Github file (opens in a new tab).

The elements imported from tab-contents are components used to build the UI. This file should also be located in the src/app folder, called tab-contents.tsx, and should be populated with the code located in this GitHub file (opens in a new tab).

Otherwise, the create-next-app boilerplate code is quite standard. There is a connect() function that instantiates the provider by grabbing network configuration from your browser wallet (make sure you are connected to BaseGoerli) and a checkConnection() function wrapped in useEffect that automatically triggers a connection when the page is first loaded.

Getting a UUID

The first step in retrieving onchain Stamp data is querying the UUID associated with your user's address in the resolver contract. You can start by defining a function, getUuid(). The first action to take inside getUuid() is to instantiate the resolverContract. You can do this using ethers.Contract() passing the contract address, it's ABI and the provider as arguments. Then, you can call the contract's passports() function, passing the connected user's address. This will return a uuid that you can assign to a new const, as follows:

async function getUuid() {
  const resolverContract: ethers.Contract = new ethers.Contract(resolverContractAddress, resolverAbi, provider)
  const uuid = await resolverContract.passports(address)
}

It is also a good idea to add some error handling here, as it is possible that your connected user hasn't migrated any Stamps onchain yet, and may not have a uuid associated with their address. In this case, the returned uuid would be equal to the 32-byte hex encoded representation of 0:

0x0000000000000000000000000000000000000000000000000000000000000000

Here, you can simply log a warning to console if the return value is zero.

Your getUuid() function will look as follows:

async function getUuid() {
  const resolverContract: ethers.Contract = new ethers.Contract(resolverContractAddress, resolverAbi, provider)
  const uuid = await resolverContract.passports(address)
  console.log(uuid)
  if (uuid == "0x0000000000000000000000000000000000000000000000000000000000000000") {
    (console.log("The submitted address does not have Passport data onchain!"))
  } else {
    return uuid
  }
}

If the user does have onchain Stamps, the returned value will be some non-zero 32-byte hex string.

Getting an Attestation

Now you have a uuid you can use it to retrieve an Attestation. This is done using the EasContract. This is the EAS registry that associates Attestations with uuids. The flow is the same as for getUuid() - you instantiate the relevant contract and call a function on it. In this case you instantiate the EasContract and call its getAttestation() function, passing the uuid.

async function getAttestation(uuid: string) {
  const EasContract: ethers.Contract = new ethers.Contract(EasContractAddress, EasAbi, provider)
  const attestation = await EasContract.getAttestation(uuid)
  return attestation
}

The Attestation is returned in the form of an object with the following structure:

"uid": "0x0e9f4e1ecda9c93aa53914b2f4fc4844b33068b28f8aed6b7a4f488084647ad4"
"schema":"0xb32dc5bea1673f9adede5b96abdcf0f79354c9e3bbb4f8b1e678b07138d2ec02"
"time":1690828108n
"expirationTime":0n
"revocationTime":0n
"refUID":"0x0000000000000000000000000000000000000000000000000000000000000000"
"recipient":"0xC79ABB54e4824Cdb65C71f2eeb2D7f2db5dA1fB8"
"attester":"0x5bbBC733E12f50e6834c40A90066F2f9FFb820e0"
"revocable":true
"data":"0x00000000000000000000000000000000000000000000000000000000000000a000000000000000000000000000000000000000000000000000000000000000e0000000000000000000000000000000000000000000000000000000000000026000000000000000000000000000000000000000000000000000000000000003e0000000000000000000000000000000000000000000000000000000000000000000000000000000000000000000000000000000000000000000000000000000010000000000000000000000000000000000000000000000000000c01f83800000000000000000000000000000000000000000000000000000000000000000000bfa5a2bdfeb8568d805d0ec5d0cacee1942d32db8b035dd5e76324fa998c2454c68f856c137d03394ae23982d1ac02f6166182fb1c62bc8d695e4d9fa4e38520630ec8e5b24e98dbbc6968f250c74f0d67e1dcf4d872479ead284a4845c2bcdb5a2a3bf715af346613ecd6538097993c96e5d2484157a94f0cfe185348fad1aef5277c9e0fa252a8b136a31890ce81cb3383ed617178a4da85408d0a30a182544f1e63da51d1d25a24b32dab40c1acce87ec5ea22a11614e07bcae03194ec77959a58dbc0ba6fbf3fea1bad5cef5fa00ab55764c85896d2f3ae1dc418a28ec8c8cb758a0fa4add1b710030c6e826a3b1f830ae56af551e696ff7dd158fc25fc406e48b2221130c1251a3ab9bcd0917f6a9a3799477bd238a35482266bbea6890aee6a898063a23c587f592cd3c56ed879c7b6d113c67f8a256fd727288d0a2cbfeeaecaa5d52376214d17524258a2f744e1533352c633431395ec3686ab6ebfcb000000000000000000000000000000000000000000000000000000000000000b0000000000000000000000000000000000000000000000000000000064bad1d60000000000000000000000000000000000000000000000000000000064bad1d60000000000000000000000000000000000000000000000000000000064bad1d60000000000000000000000000000000000000000000000000000000064bad1e10000000000000000000000000000000000000000000000000000000064bad1e10000000000000000000000000000000000000000000000000000000064bad1e10000000000000000000000000000000000000000000000000000000064bad1e20000000000000000000000000000000000000000000000000000000064bad1e30000000000000000000000000000000000000000000000000000000064bad1e400000000000000000000000000000000000000000000000000000000647a3c1600000000000000000000000000000000000000000000000000000000647a3c17000000000000000000000000000000000000000000000000000000000000000b00000000000000000000000000000000000000000000000000000000653178d600000000000000000000000000000000000000000000000000000000653178d600000000000000000000000000000000000000000000000000000000653178d600000000000000000000000000000000000000000000000000000000653178e100000000000000000000000000000000000000000000000000000000653178e100000000000000000000000000000000000000000000000000000000653178e100000000000000000000000000000000000000000000000000000000653178e200000000000000000000000000000000000000000000000000000000653178e300000000000000000000000000000000000000000000000000000000653178e40000000000000000000000000000000000000000000000000000000064f0e3160000000000000000000000000000000000000000000000000000000064f0e317"

The individual Stamp data is embedded in this object, but it is encoded according to the Attestation schema and arrives as a hex-encoded string. This means the next step is decoding the Attestation.

Note You can also check your attestations using the Ethereum Attestation Service explorer (opens in a new tab). Note that the explorer is deployed on separate subdomains for each network (e.g. for Optimism the URL is optimism.easscan.org (opens in a new tab)) There, you can search for your address and see your Attestations in the browser. You can also search for the Passport Attestation Schema (opens in a new tab)) or the Gitcoin attester contract (opens in a new tab). The links in this note direct to the relevant resources for the Base Goerli network.

Decoding the Attestation

Decoding the Attestation means isolating and interpreting specific chunks of the Attestations data field and assigning them to fields in a new struct defined according to the Attestation schema.

Thankfully, there are some pre-built tools that can help with this decoding. First, the SchemaEncoder object imported from the eas-sdk. You can create an instance of the SchemaEncoder using the Gitcoin Passport Attestation schema, and then use its decodeData() function to parse the encoded data in the Attestation into a new struct of type SchemaDecodedItem.

Here's what that process looks like:

const schemaEncoder = new SchemaEncoder(
  "uint256[] providers,bytes32[] hashes,uint64[] issuanceDates,uint64[] expirationDates,uint16 providerMapVersion"
);
const decodedData = schemaEncoder.decodeData(attestation.data)

Next, you want to isolate the pieces of data you are actually interested in, and pull those out into their own const. In this app, you are working with the raw Stamp data, specifically the providers field. The data in providers defines precisely which Stamp is attested to for the specific user. This data is provided as a bitmap, where each position in the bitmap corresponds to a specific Stamp. Ownership of a specific Stamp is indicated with a 1 in the appropriate index, whereas a 0 indicates that the user does not own that specific Stamp. The following line of code pulls the providers bitmap out of the decoded Attestation object.

const providers = decodedData.find((data) => data.name === "providers")?.value.value as BigNumber[];

Now you need to decode the bitmap by identifying the positions of any 1s and looking up the Stamp info associated with that position. The mapping from bitmap to specific Stamp data is defined in a json object called providerBitmapInfo which you have already imported from ./providerInfo.ts.

This also requires defining a new struct to receive the provider data into (onChainProviderInfo), and a map and filter function that extracts the bitmap elements, grabs the associated data from the providerBitmapInfo file, decodes it and assigns the result to instances of onChainProviderInfo and pushes each instance into an array. Altogether, this looks as follows:

type DecodedProviderInfo = {
    providerName: PROVIDER_ID;
    providerNumber: number;
  };
  const onChainProviderInfo: DecodedProviderInfo[] = providerBitMapInfo
    .map((info) => {
      const providerMask = BigNumber.from(1).shl(info.bit);
      const currentProvidersBitmap = providers[info.index];
      if (currentProvidersBitmap && !providerMask.and(currentProvidersBitmap).eq(BigNumber.from(0))) {
        return {
          providerName: info.name,
          providerNumber: info.index * 256 + info.bit,
        };
      }
    })
    .filter((provider): provider is DecodedProviderInfo => provider !== undefined);

All this decoding logic can be wrapped up into a single function, decodeAttestation(). This function should take in the Attestation as an argument and return an array of Stamp provider data. The full function looks as follows (you can paste this into your app):

async function decodeAttestation(attestation: Attestation) {
    const schemaEncoder = new SchemaEncoder(
      "uint256[] providers,bytes32[] hashes,uint64[] issuanceDates,uint64[] expirationDates,uint16 providerMapVersion"
    );
    const decodedData = schemaEncoder.decodeData(attestation.data)
    const providers = decodedData.find((data) => data.name === "providers")?.value.value as BigNumber[];
    type DecodedProviderInfo = {
      providerName: PROVIDER_ID;
      providerNumber: number;
    };
    const onChainProviderInfo: DecodedProviderInfo[] = providerBitMapInfo
      .map((info) => {
        const providerMask = BigNumber.from(1).shl(info.bit);
        const currentProvidersBitmap = providers[info.index];
        if (currentProvidersBitmap && !providerMask.and(currentProvidersBitmap).eq(BigNumber.from(0))) {
          return {
            providerName: info.name,
            providerNumber: info.index * 256 + info.bit,
          };
        }
      })
      .filter((provider): provider is DecodedProviderInfo => provider !== undefined);
 
    return onChainProviderInfo
  }

Extracting Stamps

At this point you have functions that grab a uuid from an address, an Attestation from a uuid, decode the Attestation and create an array of decoded data for each provider for each Stamp owned by the user. Next, you can simply extract the Stamp name from each of the decoded provider data, yielding an array of the names of the Stamps the user owns.

Notice that the boilerplate code includes some predefined state variables, including stamps and hasStamps. These are for tracking the user's Stamps. stamps is an array that will contain the names of the stamps owned by the user, and hasStamps is a simple Boolean that is true if the user owns some Stamps, and false if the user has no Stamps. These will be used later to render information in the UI.

The next step is to write a function to extract the Stamp names from the provider data into an array, and then set the values of the state variables stamps and hasStamps. The following code snippet contains that function - you can paste it into your app:

function getStamps(onChainProviderInfo: DecodedProviderInfo[]) {
    const stamps: Array<Stamp> = []
    onChainProviderInfo.forEach(toArray)
    function toArray(item: any, index: number) {
      let s = { id: index, stamp: item.providerName }
      stamps.push(s)
    }
    setStamps(stamps)
    setHasStamps(stamps.length > 0)
    return stamps
  }

Well done! at this point you have implemented all the logic required to retrieve the list of Stamps owned by your connected user! For some apps, this might be all you need - you can simply display the contents of stamps to show which Stamps are owned by the user.

Calculating a score

Passport scores are calculated by summing weights assigned to each specific Stamp. Gitcoin have defined a list of Stamp weights that are used when scoring is done on the Gitcoin server. In this app, you will use the same weights to calculate a score from the onchain Stamps. The weights themselves are defined in the stamp-weights.ts file that you are already importing in the boilerplate code.

To create a score, you need to write a function that iterates over your list of Stamp names, looks up each name in the stamp weights data, and adds that weight to as cumulative sum. The sum after you have iterated over all the available Stamps becomes your Passport score. This can be achieved with the following function that you can paste into your app:

function calculate_score(stampData: Array<Stamp>) {
    let i = 0
    var scores: Array<number> = []
    var score = 0;
    while (i < stampData.length) {
      let id = stampData[i].stamp
      if (GITCOIN_PASSPORT_WEIGHTS.hasOwnProperty(id)) {
        try {
          let temp_score = GITCOIN_PASSPORT_WEIGHTS[id]
          scores.push(parseFloat(temp_score))
        } catch {
          console.log("element cannot be added to cumulative score")
        }
      }
      i++;
    }
    for (let i = 0; i < scores.length; i++) {
      score += scores[i]
    }
    return score
  }

Now you have implemented all the logic required to retrieve and decode onchain Stamps and calculate a score in your app!

Executing the functions

Now you have all your app functions defined, you need to determine when and how they are executed. There is an ordering of functions implied by the return types and arguments of each function - some functions take the outputs of others as inputs.

The following function executed each function in turn, wrapped in some basic error handling:

async function queryPassport() {
    try {
      const uuid = await getUuid()
      const att = await getAttestation(uuid)
      console.log("attestation: ", att)
      const onChainProviderInfo = await decodeAttestation(att)
      const stampData = getStamps(onChainProviderInfo)
      const scoreData = calculate_score(stampData)
      setScore(scoreData)
    } catch {
      console.log("error decoding data - you might not have any data onchain!")
    }
  }

Now, all you have to do is call queryPassport() to execute all the necessary logic to retrieve stamps and score.

Stamps and scores in the UI

The boilerplate code includes a basic UI that pull sin components from tab-contents.tsx. This will render five tabs to the webpage, each containing different information. This component can take your stamp and score data and render differently depending on their values. This is already handled in the boilerplate UI. What is not yet implemented is a way to trigger the queryPassport() function. You can add a button for this. Right below the existing Button component, inside the Flex tags, you can add the following:

<Button colorScheme='teal' variant='outline' onClick={queryPassport}>Query Passport</Button>

You can browse the contents of tab-contents.tsx to see how the stamp and score data is used to render content. Conceptually, this is what's happening in each tab:

  • Home: a general introduction that renders identically for any user
  • About onchain Stamps: Information about onchain Stamps that renders identically for any user
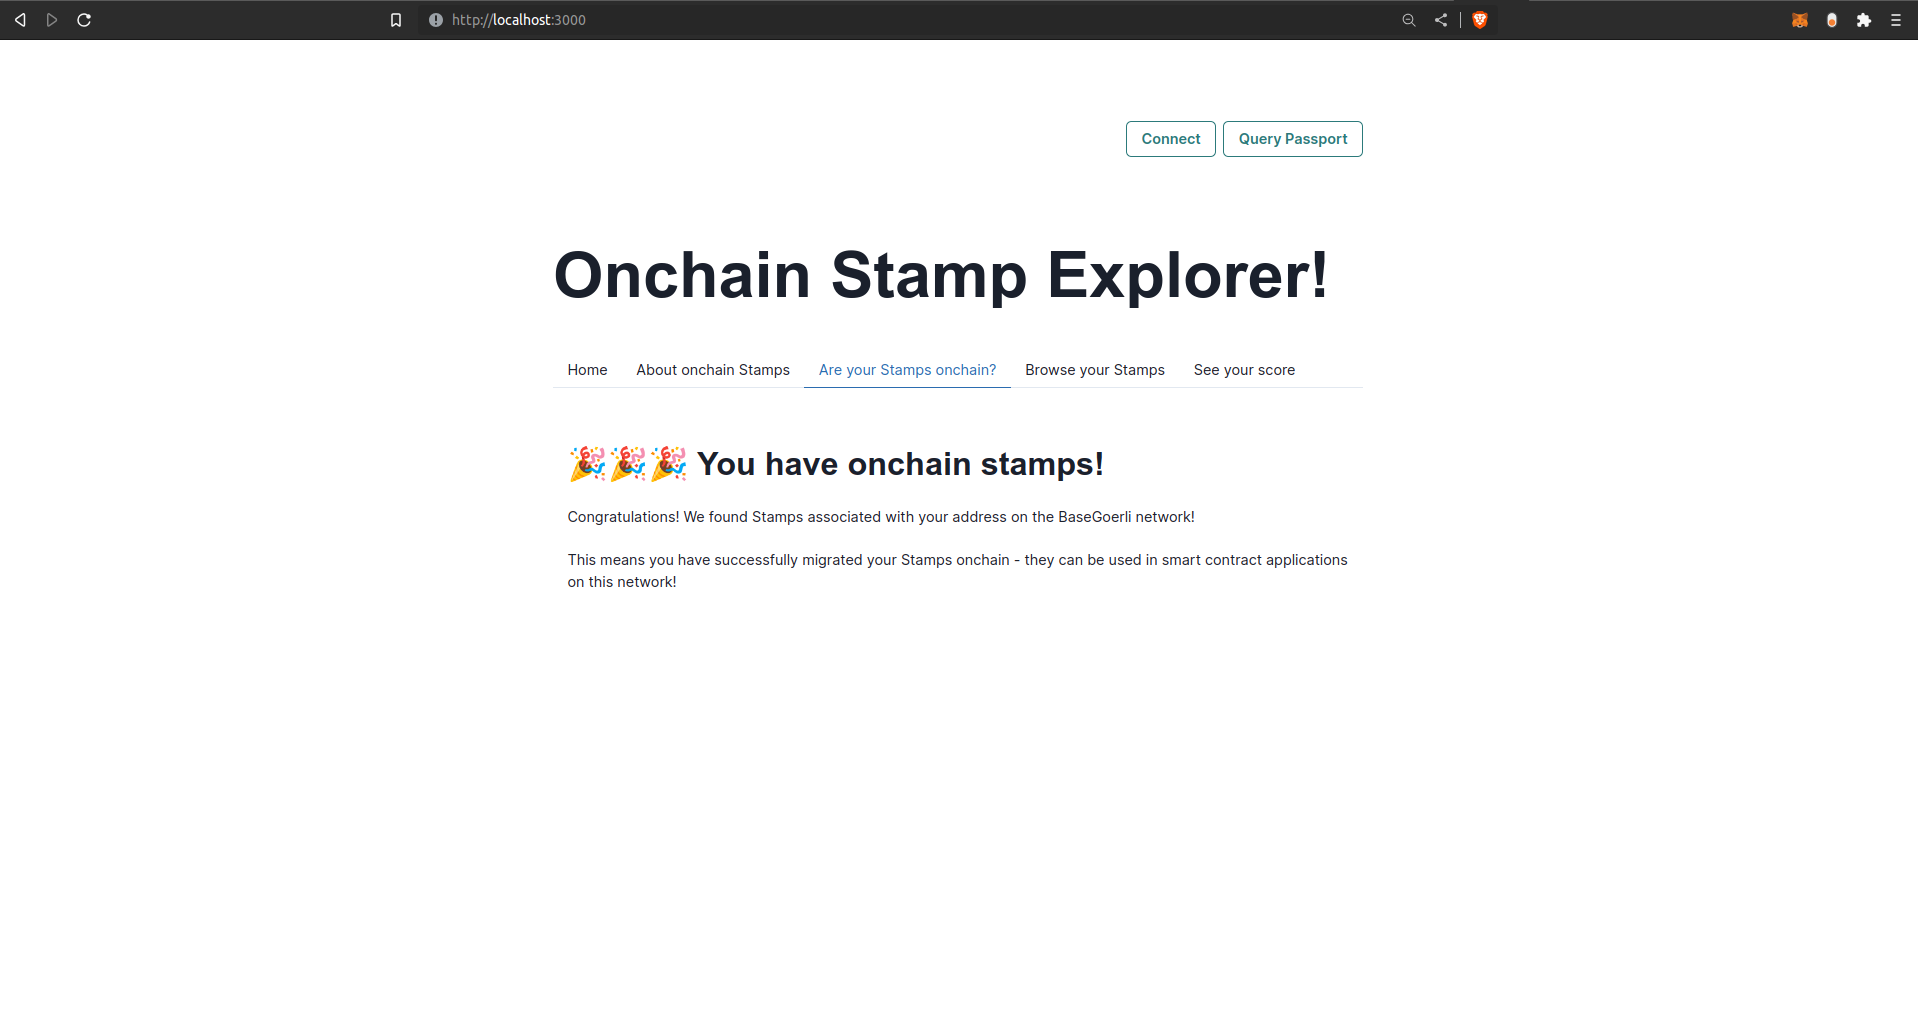
  • Are your Stamps onchain?: If the user has onchain Stamps, has connected their wallet and queried their Passport, the app will render a congratulatory message and confirm that they have onchain Stamps. If the user has not queried their Passport or they don't have any onchain Stamps they see some sad emojis and a message informing them that they have either forgotten to connect or they don't have any onchain Stamps. They are directed to the Passport app to migrate their Stamps.
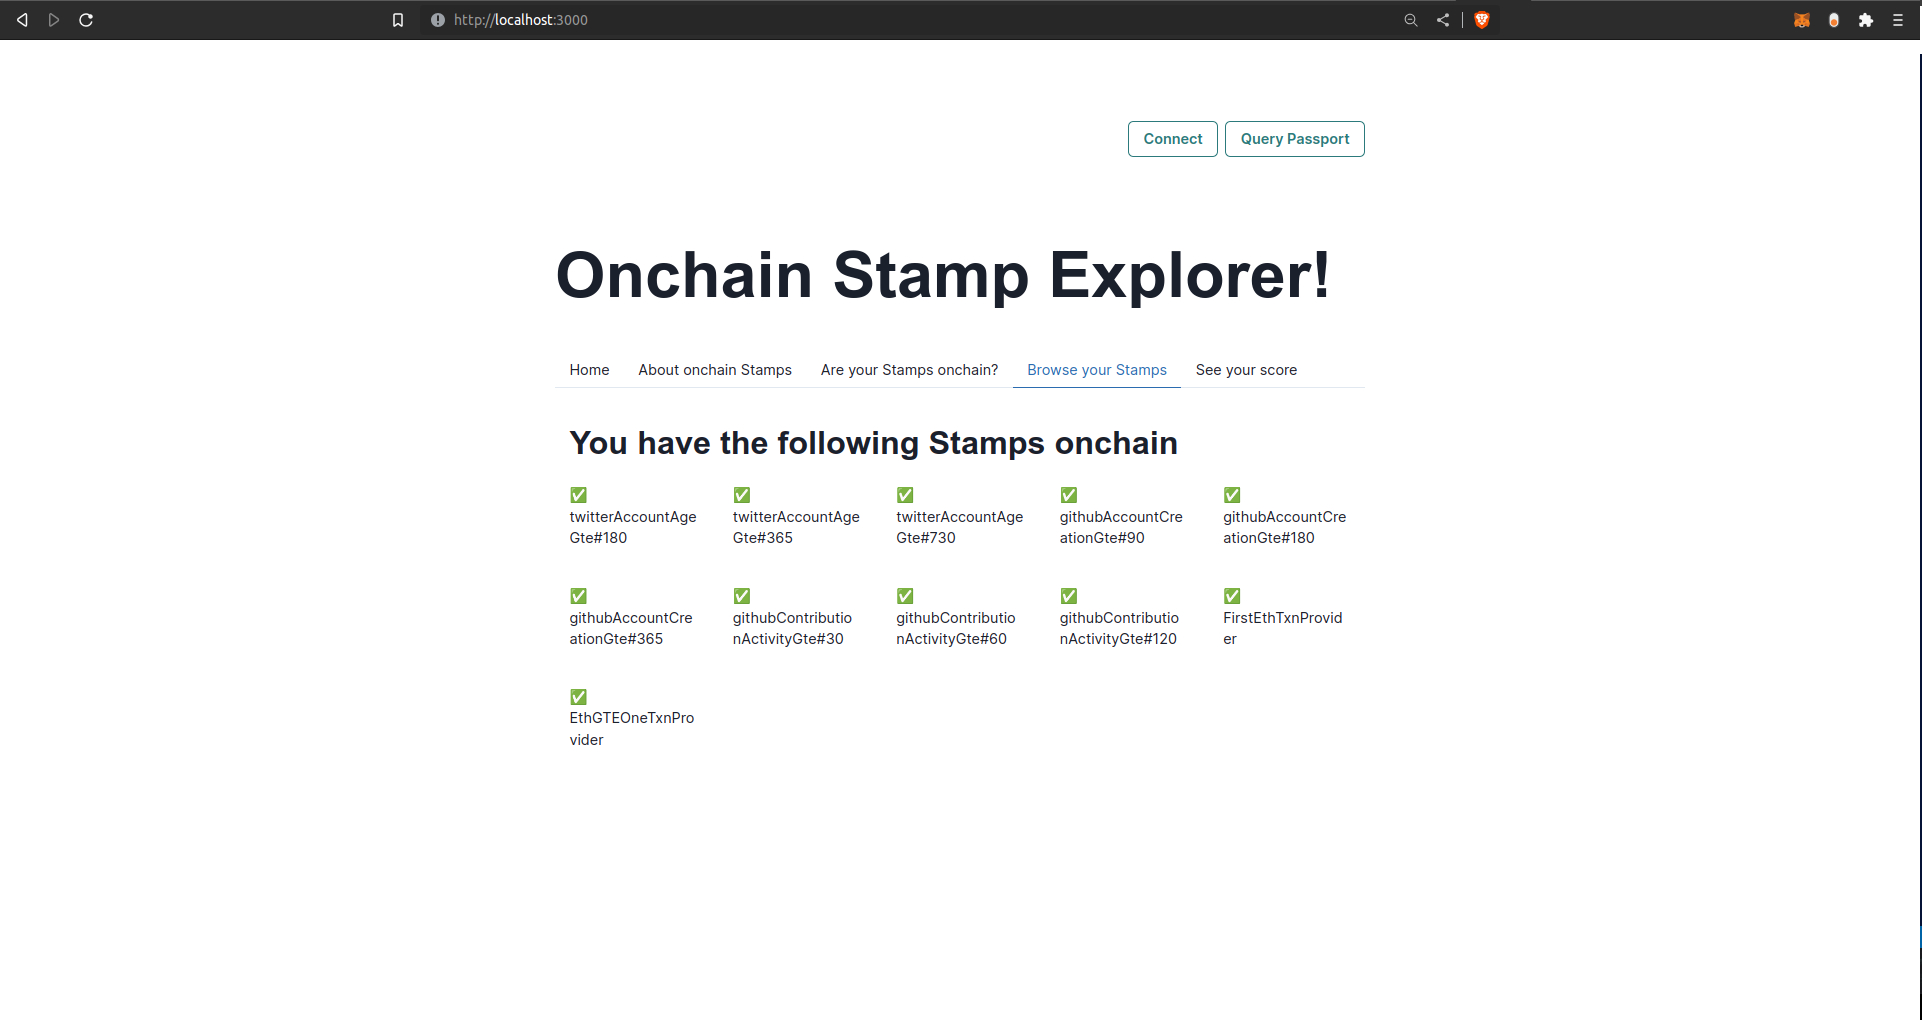
  • Browse your Stamps: If the user has onchain Stamps, has connected their wallet and queried their Passport, the app will render each Stamp in the browser. If the user has not queried their Passport or they don't have any onchain Stamps they see some sad emojis and a message informing them that they have either forgotten to connect or they don't have any onchain Stamps. They are directed to the Passport app to migrate their Stamps.
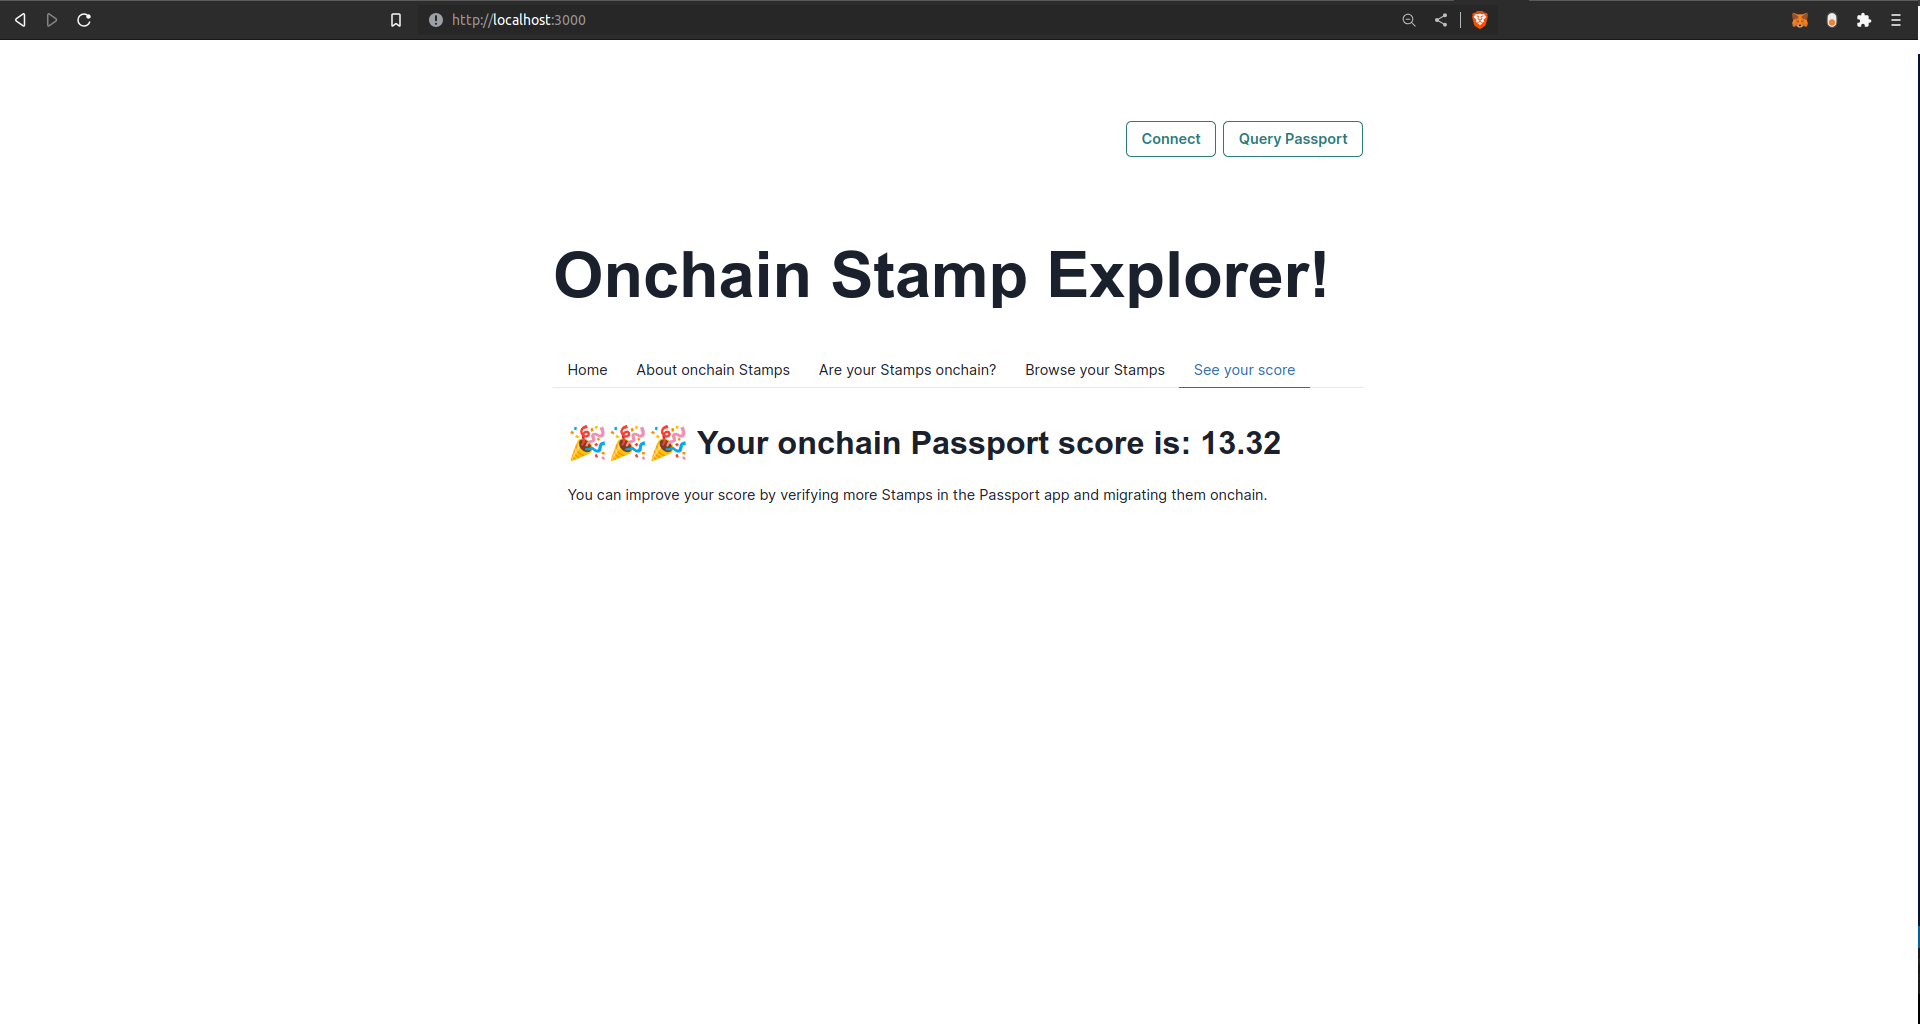
  • See your score: If the user has onchain Stamps, has connected their wallet and queried their Passport, the app will render their Passport score. If the user has not queried their Passport or they don't have any onchain Stamps they see some sad emojis and a message informing them that they have either forgotten to connect or they don't have any onchain Stamps. They are directed to the Passport app to migrate their Stamps.

Run the app

Well done - your app is ready to use! You can run it locally using

npm run dev

You can navigate to localhost:3000 to try it out!

The app looks as follows:

Summary

Congratulations - you have built an app that retrieves user Stamp data from the blockchain, calculates a Passport score and uses that information to conditionally render content to your webpage.

Now you can use the principle demonstrated here to build creatively and integrate onchain Stamps into